Forgotten Colors: Capturing Sumi-e in 3D
In this post, I share the approaches I explored to achieve the Sumi-e (水墨画) aesthetic for Forgotten Colors, a third-person puzzle-platformer where emotions shape reality. Players use talismans to shift the emotional state of each level, transforming both object behaviour and the appearance of the world. Since emotions and atmosphere are central to the experience, the visual style became a crucial part of development.
You can find the source code for the shaders on GitHub here.
Motivation and Artistic Direction
At the beginning, we only knew that the game should have a stylised and painterly look, without yet deciding on an oriental influence. As development progressed, sumi-e emerged as a natural fit for the direction we wanted to take.
Rather than simply copying the traditional monotone sumi-e style, however, our goal was to communicate emotions directly through the levels, which led us to expand the palette with additional colour themes beyond black and white.
As the sole artist and technical artist on the team, I was responsible for translating this vision into the game’s visuals. This included designing and modelling the main character, creating concept art, and developing shaders to establish the sumi-e look.
Without a clear starting point, I explored several ideas, starting with adapting a shader I had previously created for my personal 3D render challenge submission Boss Fight, by turning the toon shader into a painterly or watercolour style by adjusting the noise and its contrast.
First Approach: Reverse-Engineered Blender Shader
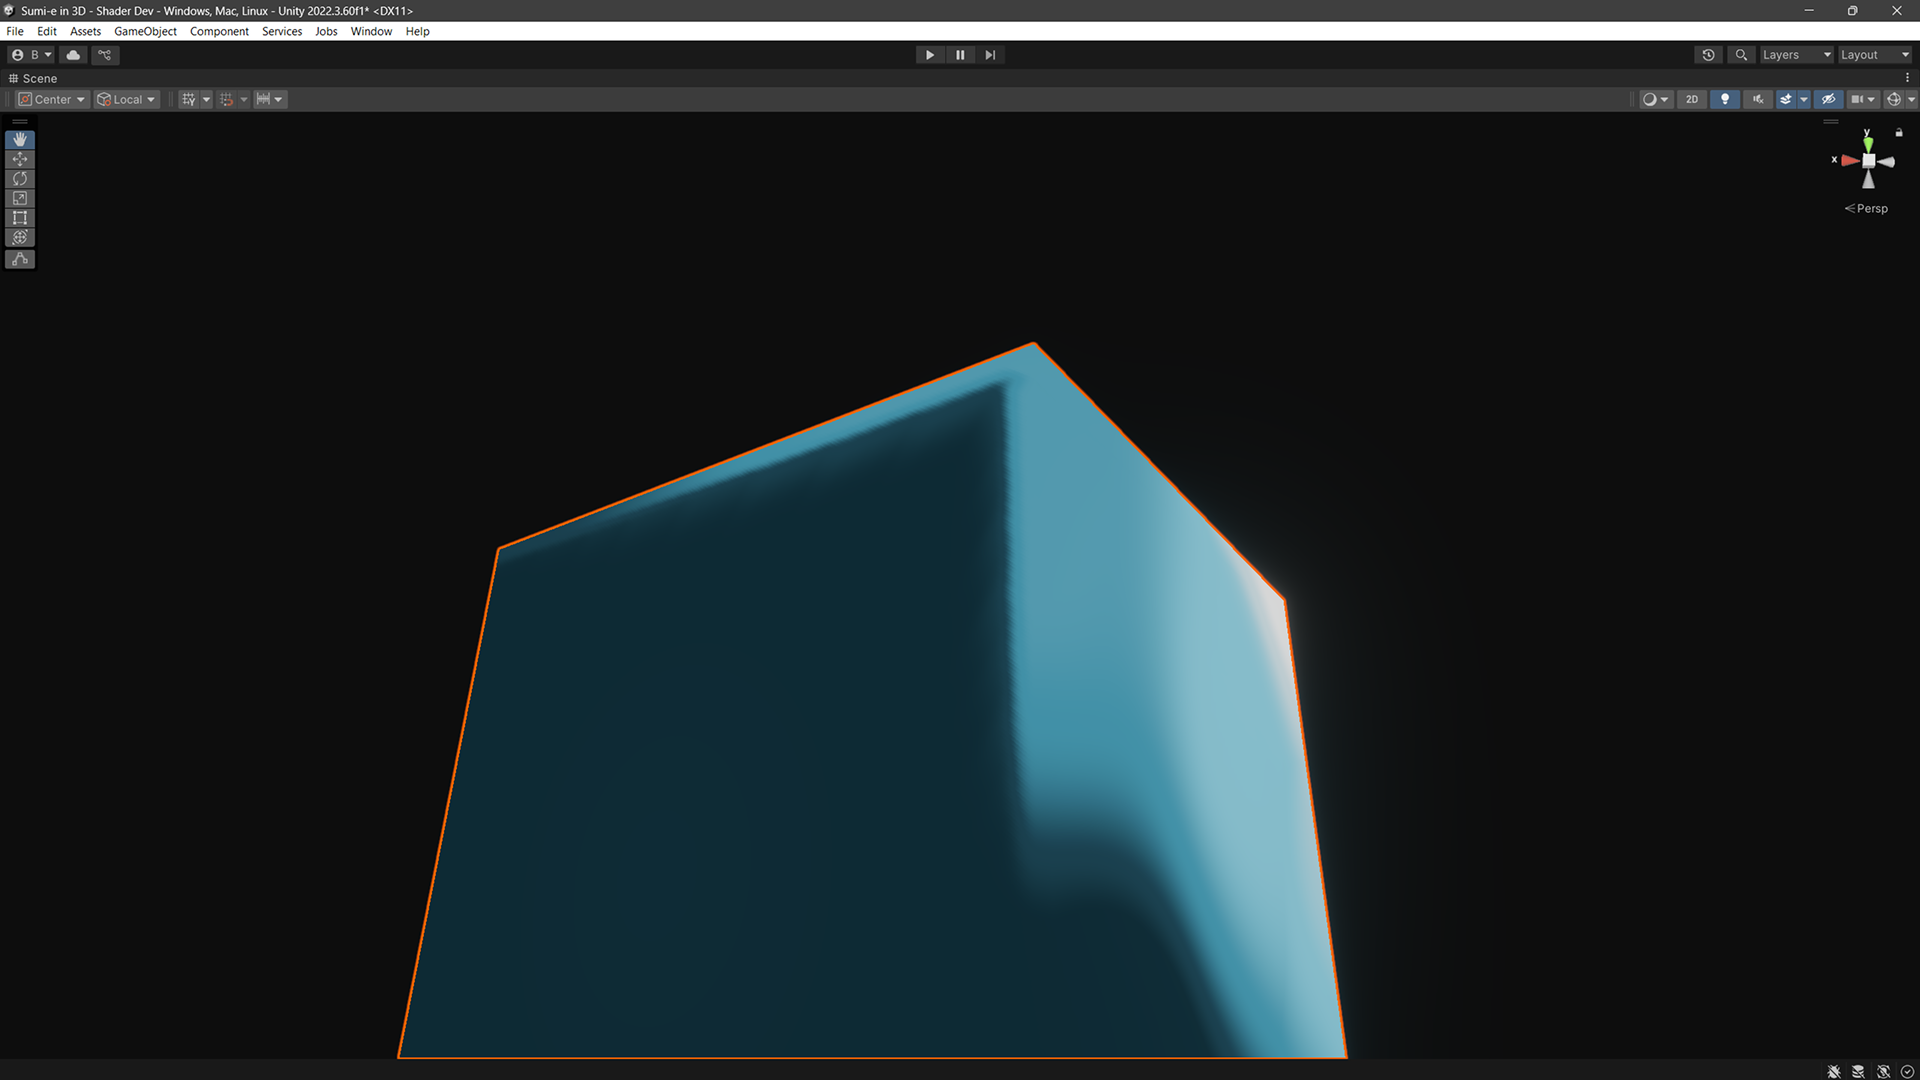
This was my first time developing such a stylised shader for a game in Unity. It meant that the shader had to look good not just on a shader ball, but also when integrated into the actual scene environment.
To explore ideas quickly, I began experimenting in Blender. Playing around with nodes there was much faster and more flexible than constantly rewriting HLSL code. At the same time, I chose to implement the shader in Unity using HLSL because I it is simply more fun for me.
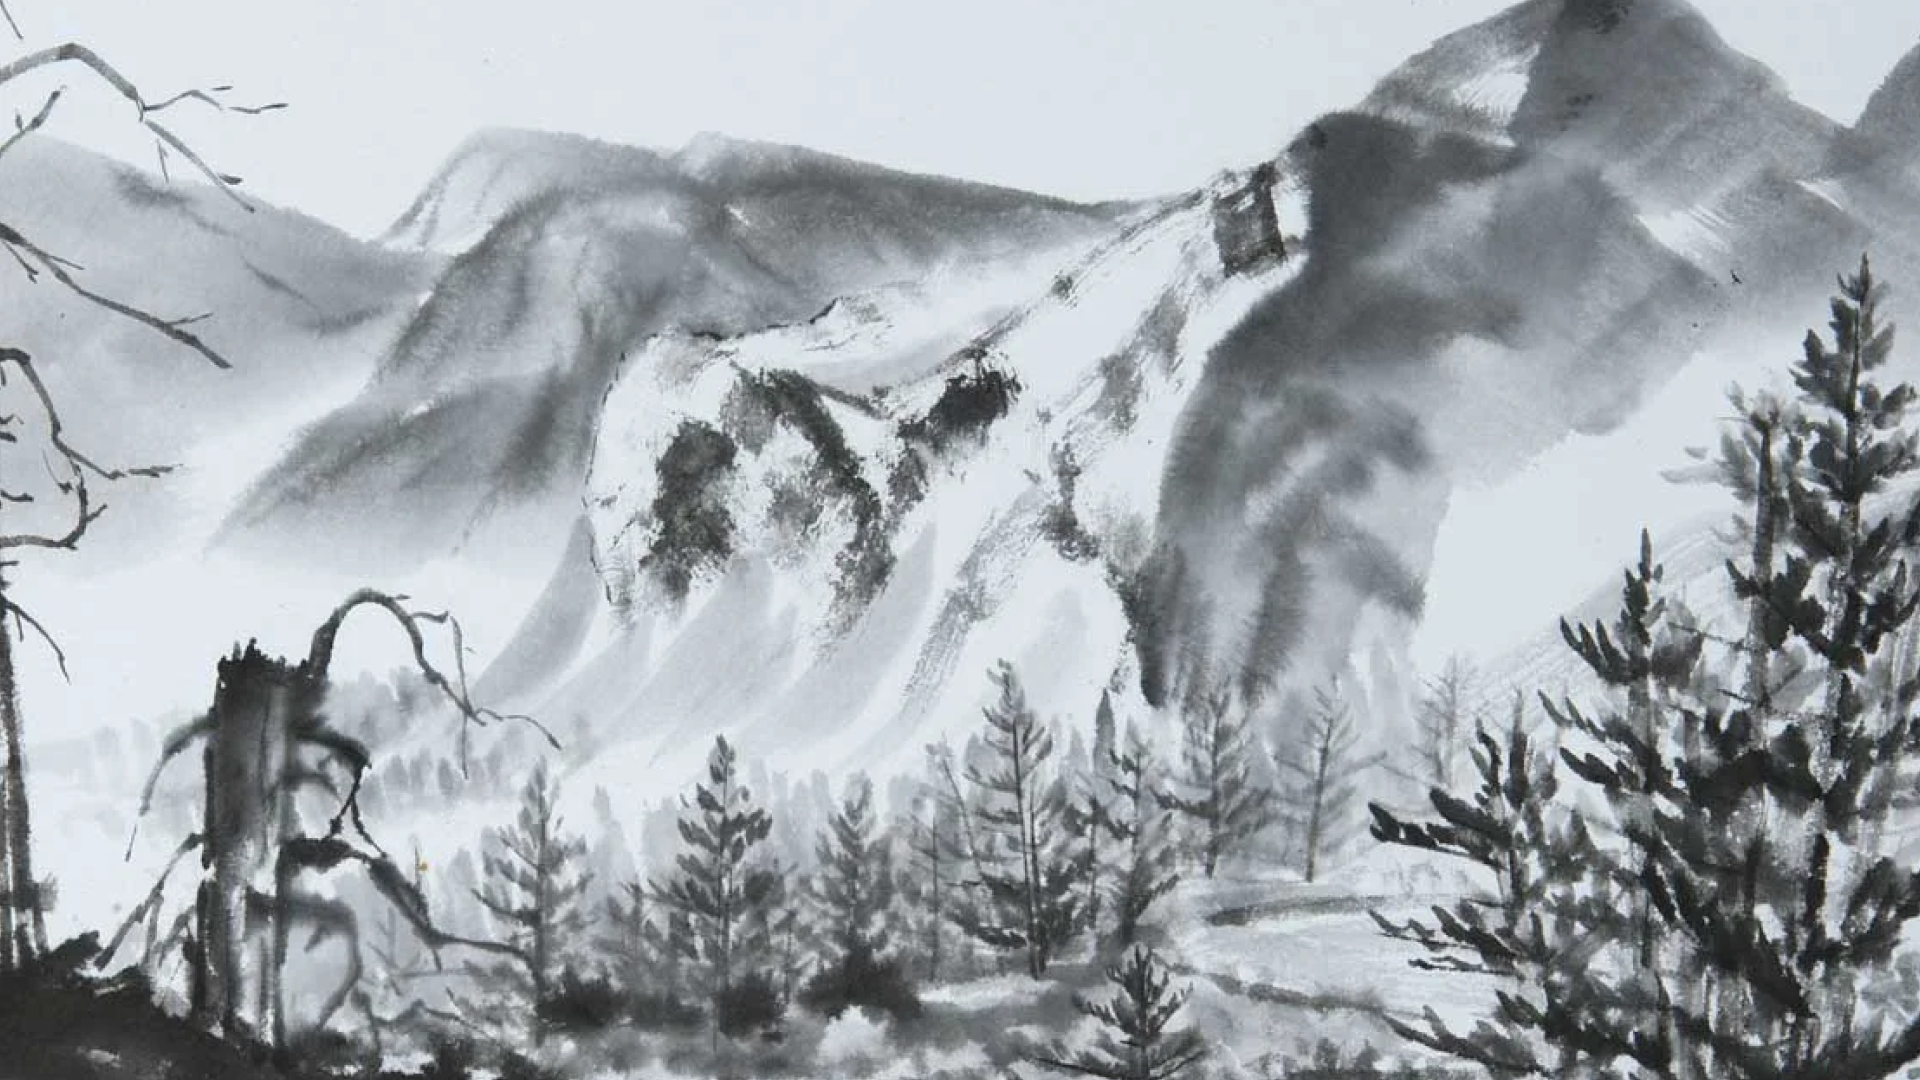
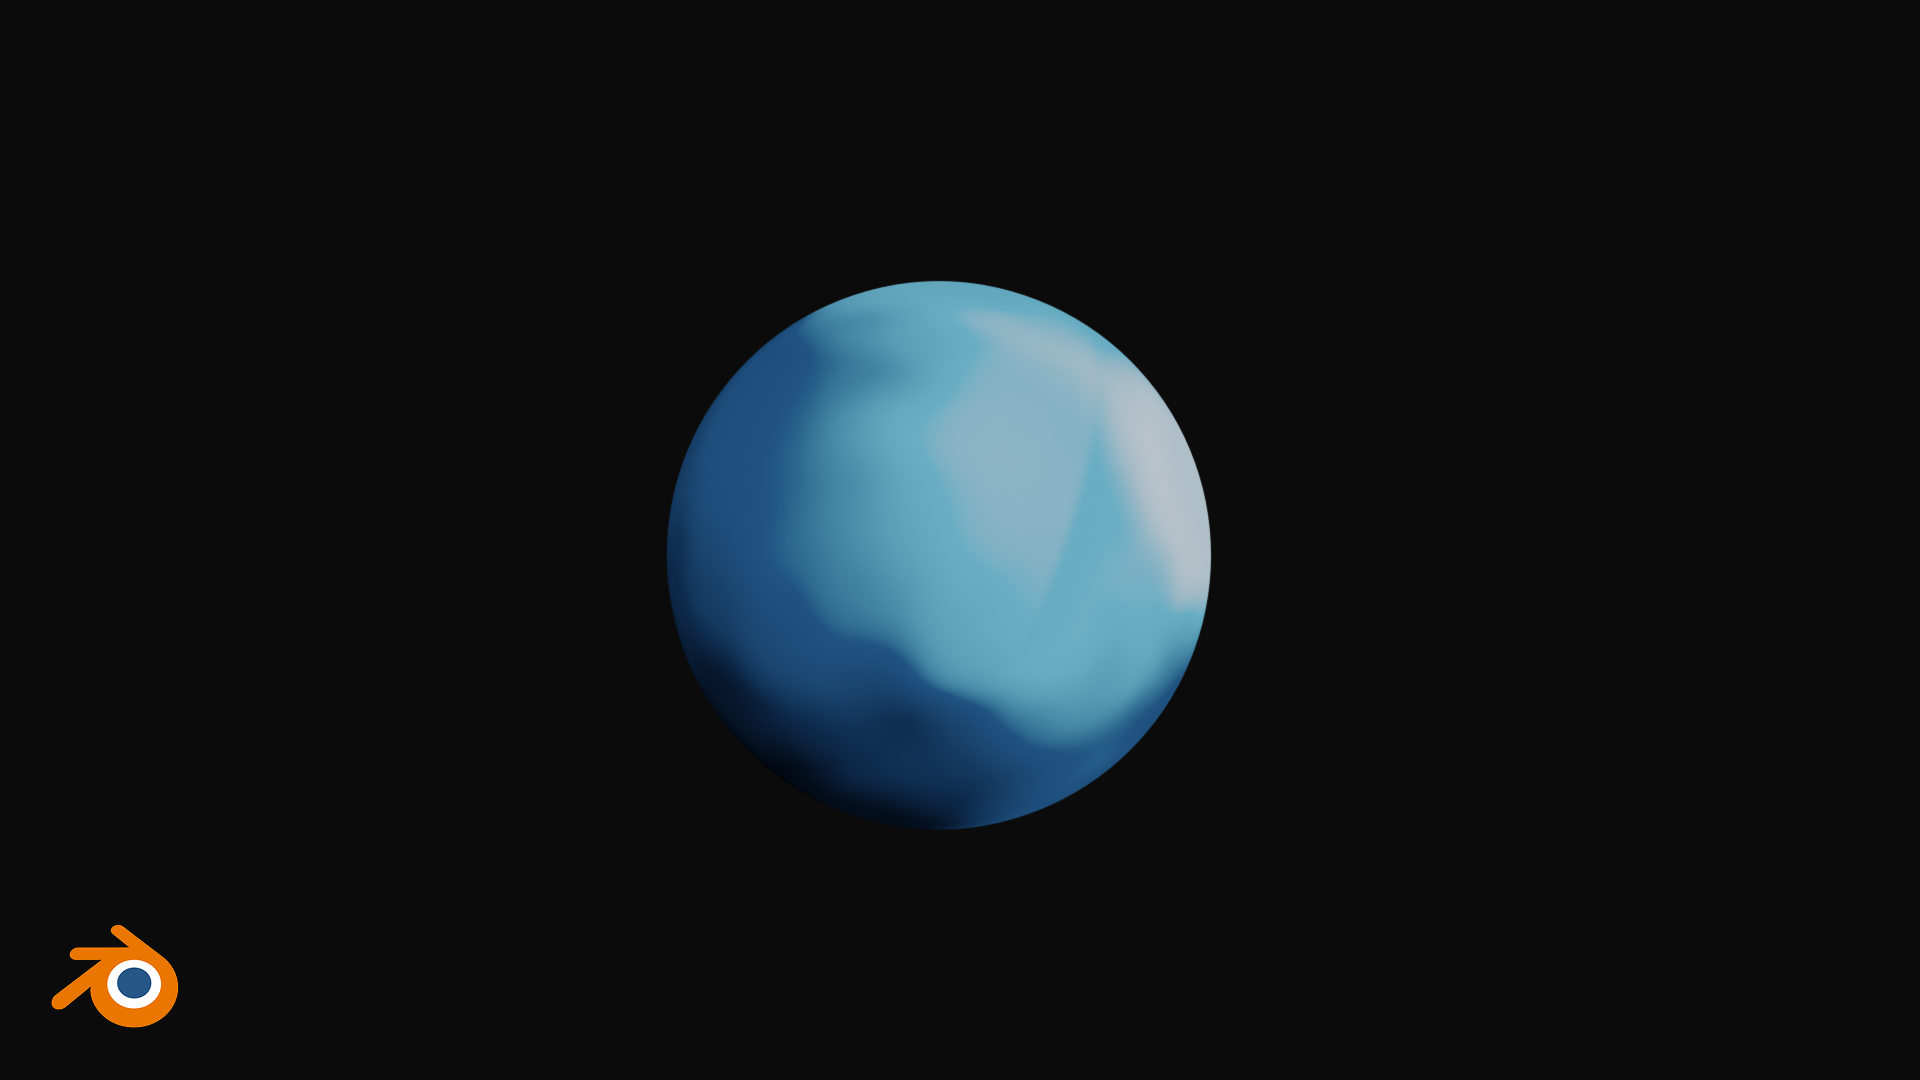
Working in Blender first also made it clear what was technically possible, which helped me identify when an issue was just a me-problem rather than it being “impossible”. So I started by smoothing the noises in the Boss Fight shader, adapted from Kevandram. This yielded promising results:
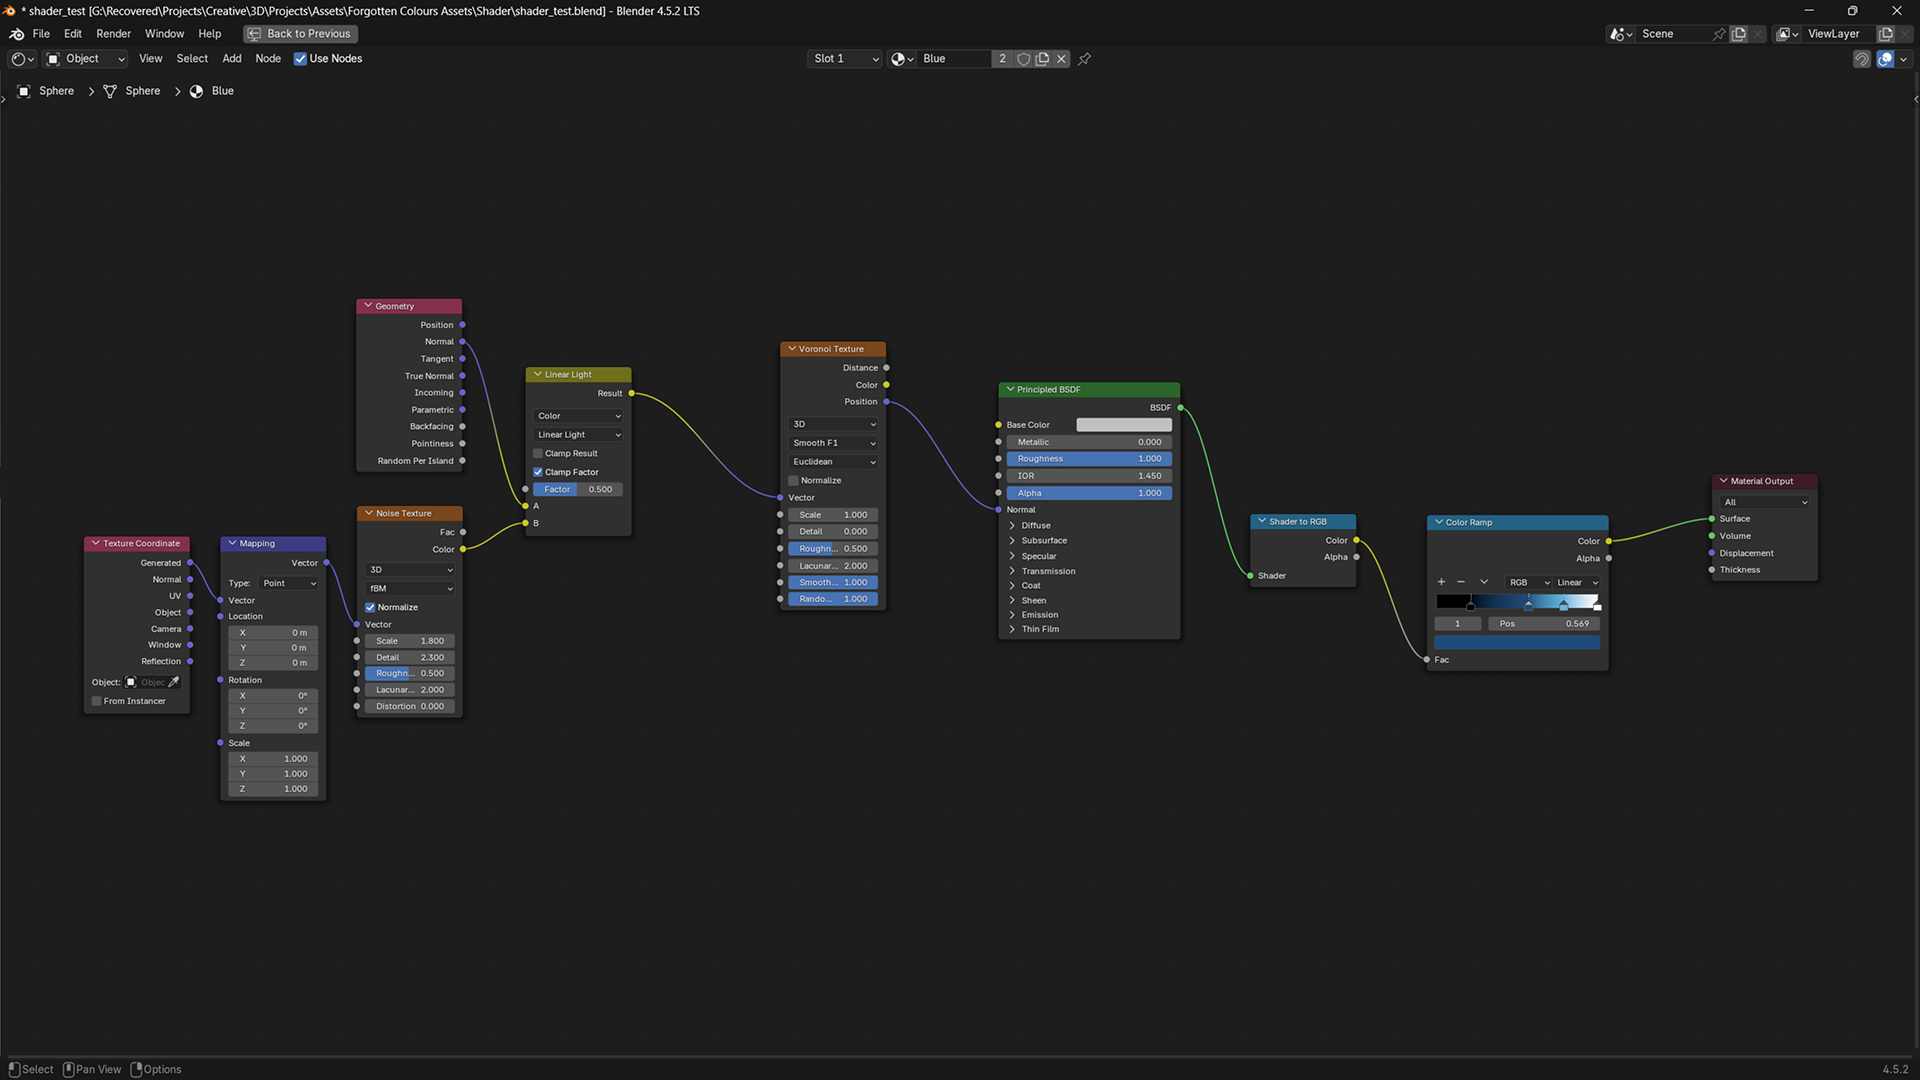
Now that I am convinced that it is technically achievable, I began reverse engineering the shader nodes.
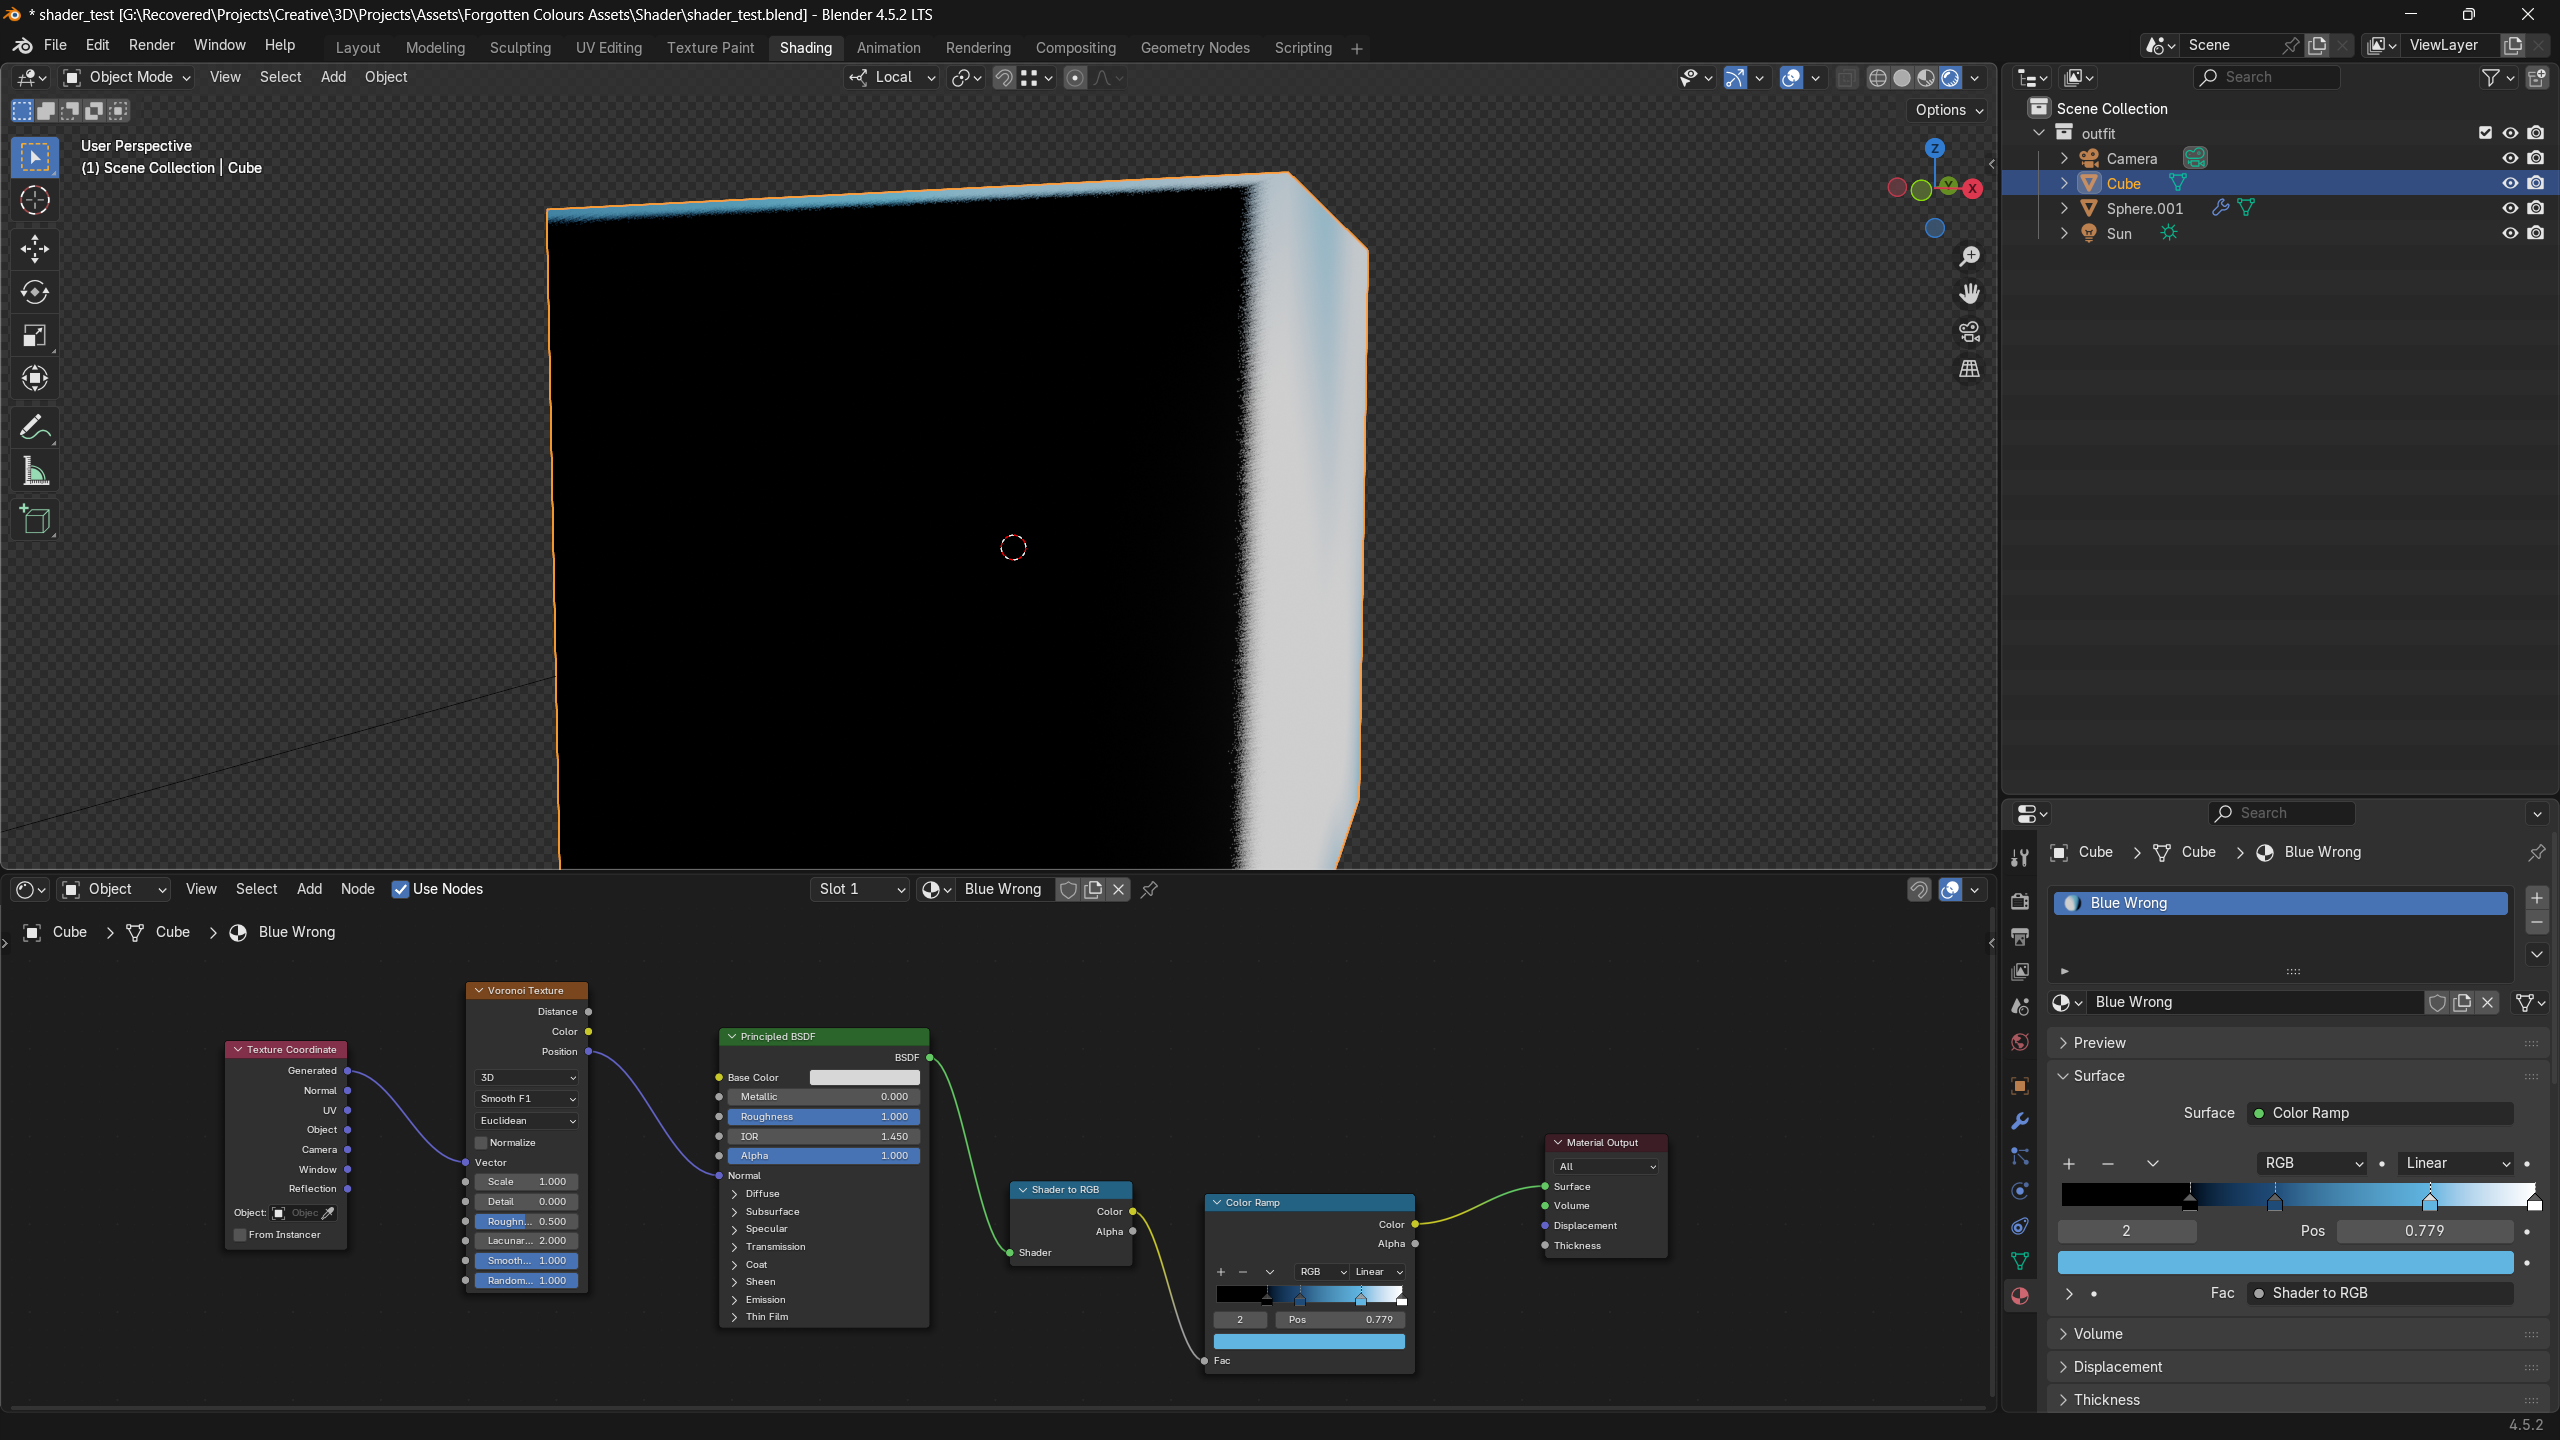
The original Blender graph consisted of five main components: Voronoi Noise, fBM Noise, Principled BSDF, Linear Light and a Colour Ramp. I simplified this to just three parts: Voronoi Noise, Blinn-Phong Lighting, and a Colour Ramp. Despite the reduction, the shader still produces the same overall visual effect:
Below is the key fragment section: the Voronoi feature points gently disturb the lighting, and the result is remapped through a colour ramp to lock it into those sumi-e style ink bands.
1
2
3
4
5
6
7
8
9
10
11
12
13
14
15
16
17
18
19
20
21
22
23
24
25
26
27
28
29
30
31
32
33
34
35
36
37
38
half4 frag(v2f input) : SV_Target
{
// Base surface colour: texture * material tint.
half4 c = tex2D(_AlbedoTex, input.uv_Albedo) * _DiffuseColour;
// Sampling shadow coords in fragment shader to avoid cascading seams.
float4 shadowCoords = TransformWorldToShadowCoord(input.fragWorldPos);
// Retrieve the primary directional (or main) light with shadow + distance attenuation.
Light mainLight = GetMainLight(shadowCoords);
// Unpacking normals from normal map into world space
half3 n = ProcessNormals(input);
// Calculating view vector
float3 v = normalize(_WorldSpaceCameraPos - input.fragWorldPos);
// Derive coordinate system for procedural noise
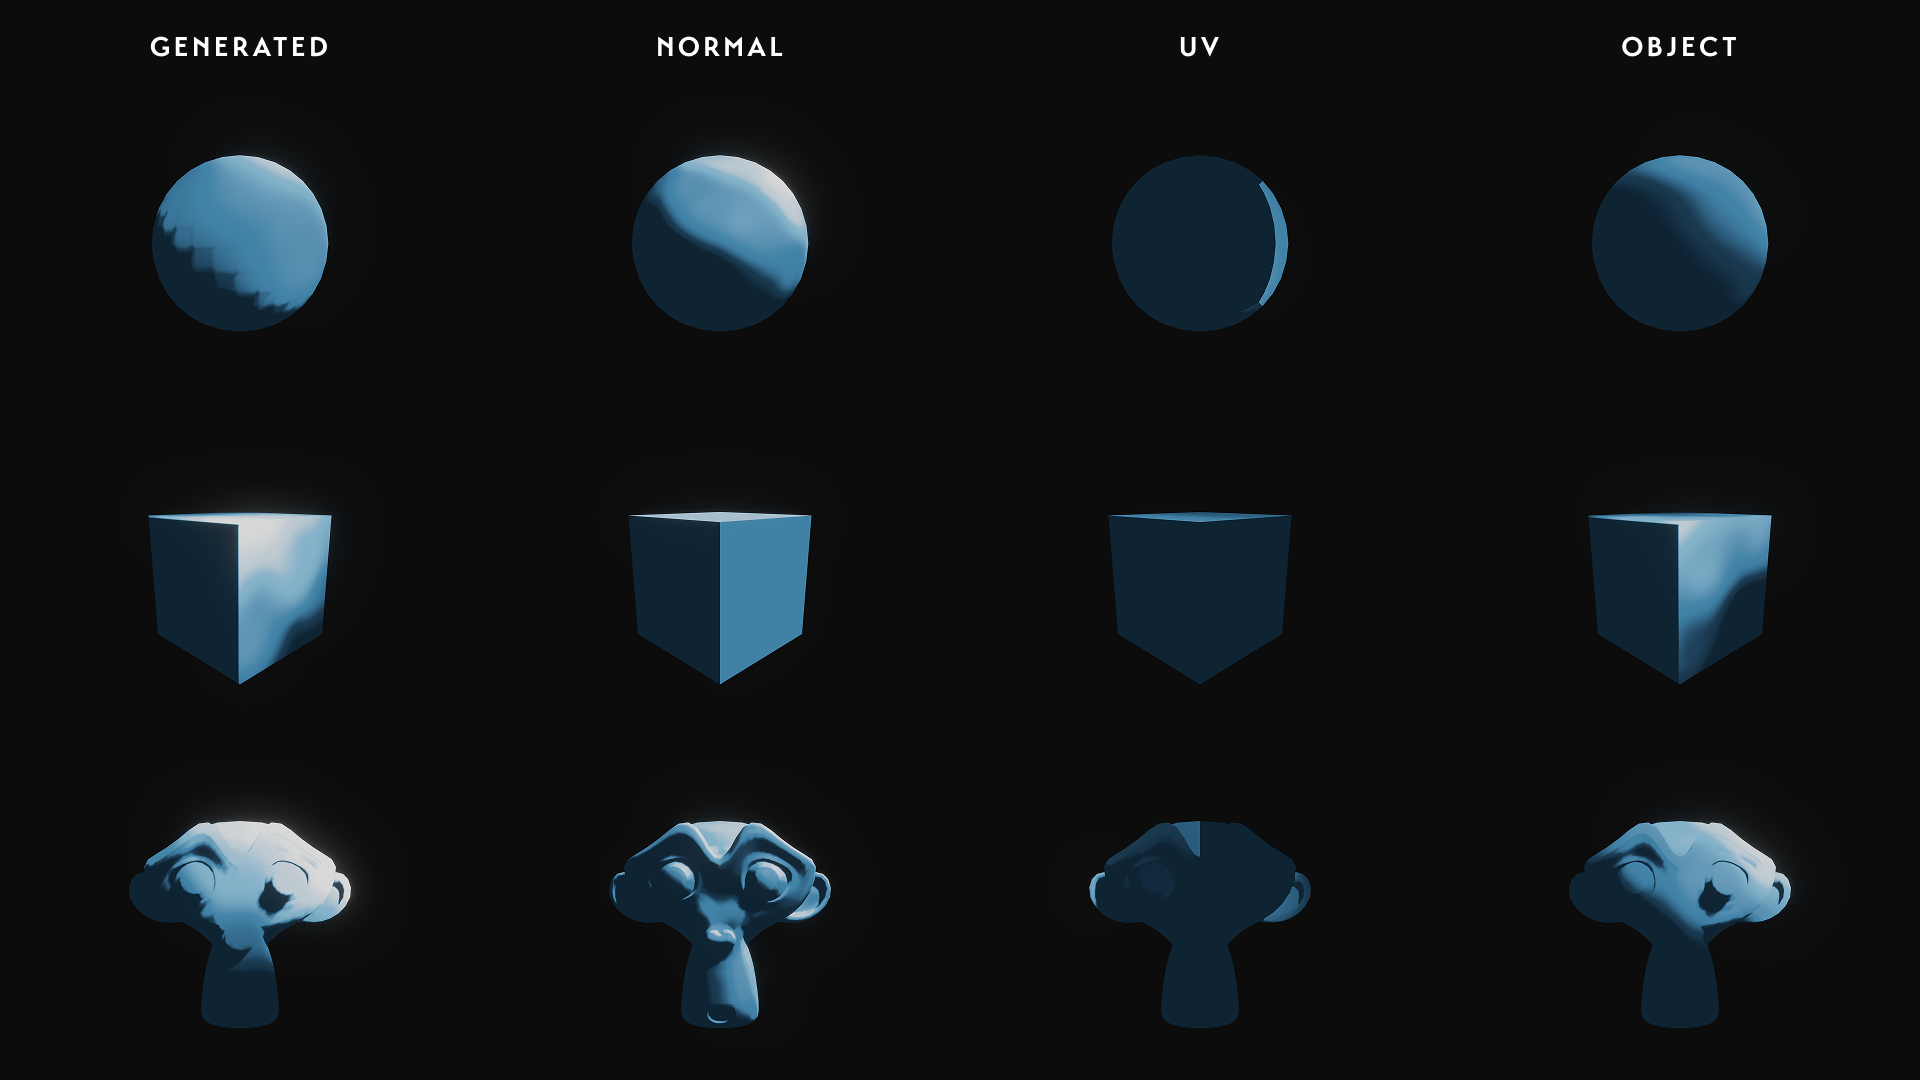
// "Texture Coordinate" node in Blender for sampling in Generated, Normal, UV, Object space
half3 noiseCoord = GetTextureSpace(_TextureSpace, n, input.fragLocalPos, input.uv_Albedo);
float dist; // Voronoi cell distance (unused for now, could drive ink pooling).
float3 col; // Raw Voronoi cell color (not used directly here).
float3 pos; // Feature point position (used below to perturb lighting).
// 3D Smooth F1 Voronoi noise
// Translated into HLSL from: https://github.com/kinakomoti-321/Voronoi_textures/blob/main/VoronoiTexture/Voronoi.glsl
VoronoiSmoothF1_3D(noiseCoord * _VoronoiScale, _VoronoiSmoothness, _VoronoiExponent, _VoronoiRandomness, _DistanceMetric, dist, col, pos);
// Stylised Blinn-Phong lighting
// Using Voronoi feature point (pos) instead of raw normal injects painterly variation.
half3 lighting = BlinnPhong(pos, v, mainLight, c) * mainLight.shadowAttenuation * mainLight.distanceAttenuation;
// Remap lighting through a colour ramp to enforce the sumi-e bands.
half3 finalColour = ColourRamp(lighting);
return half4(finalColour, 1.0);
}
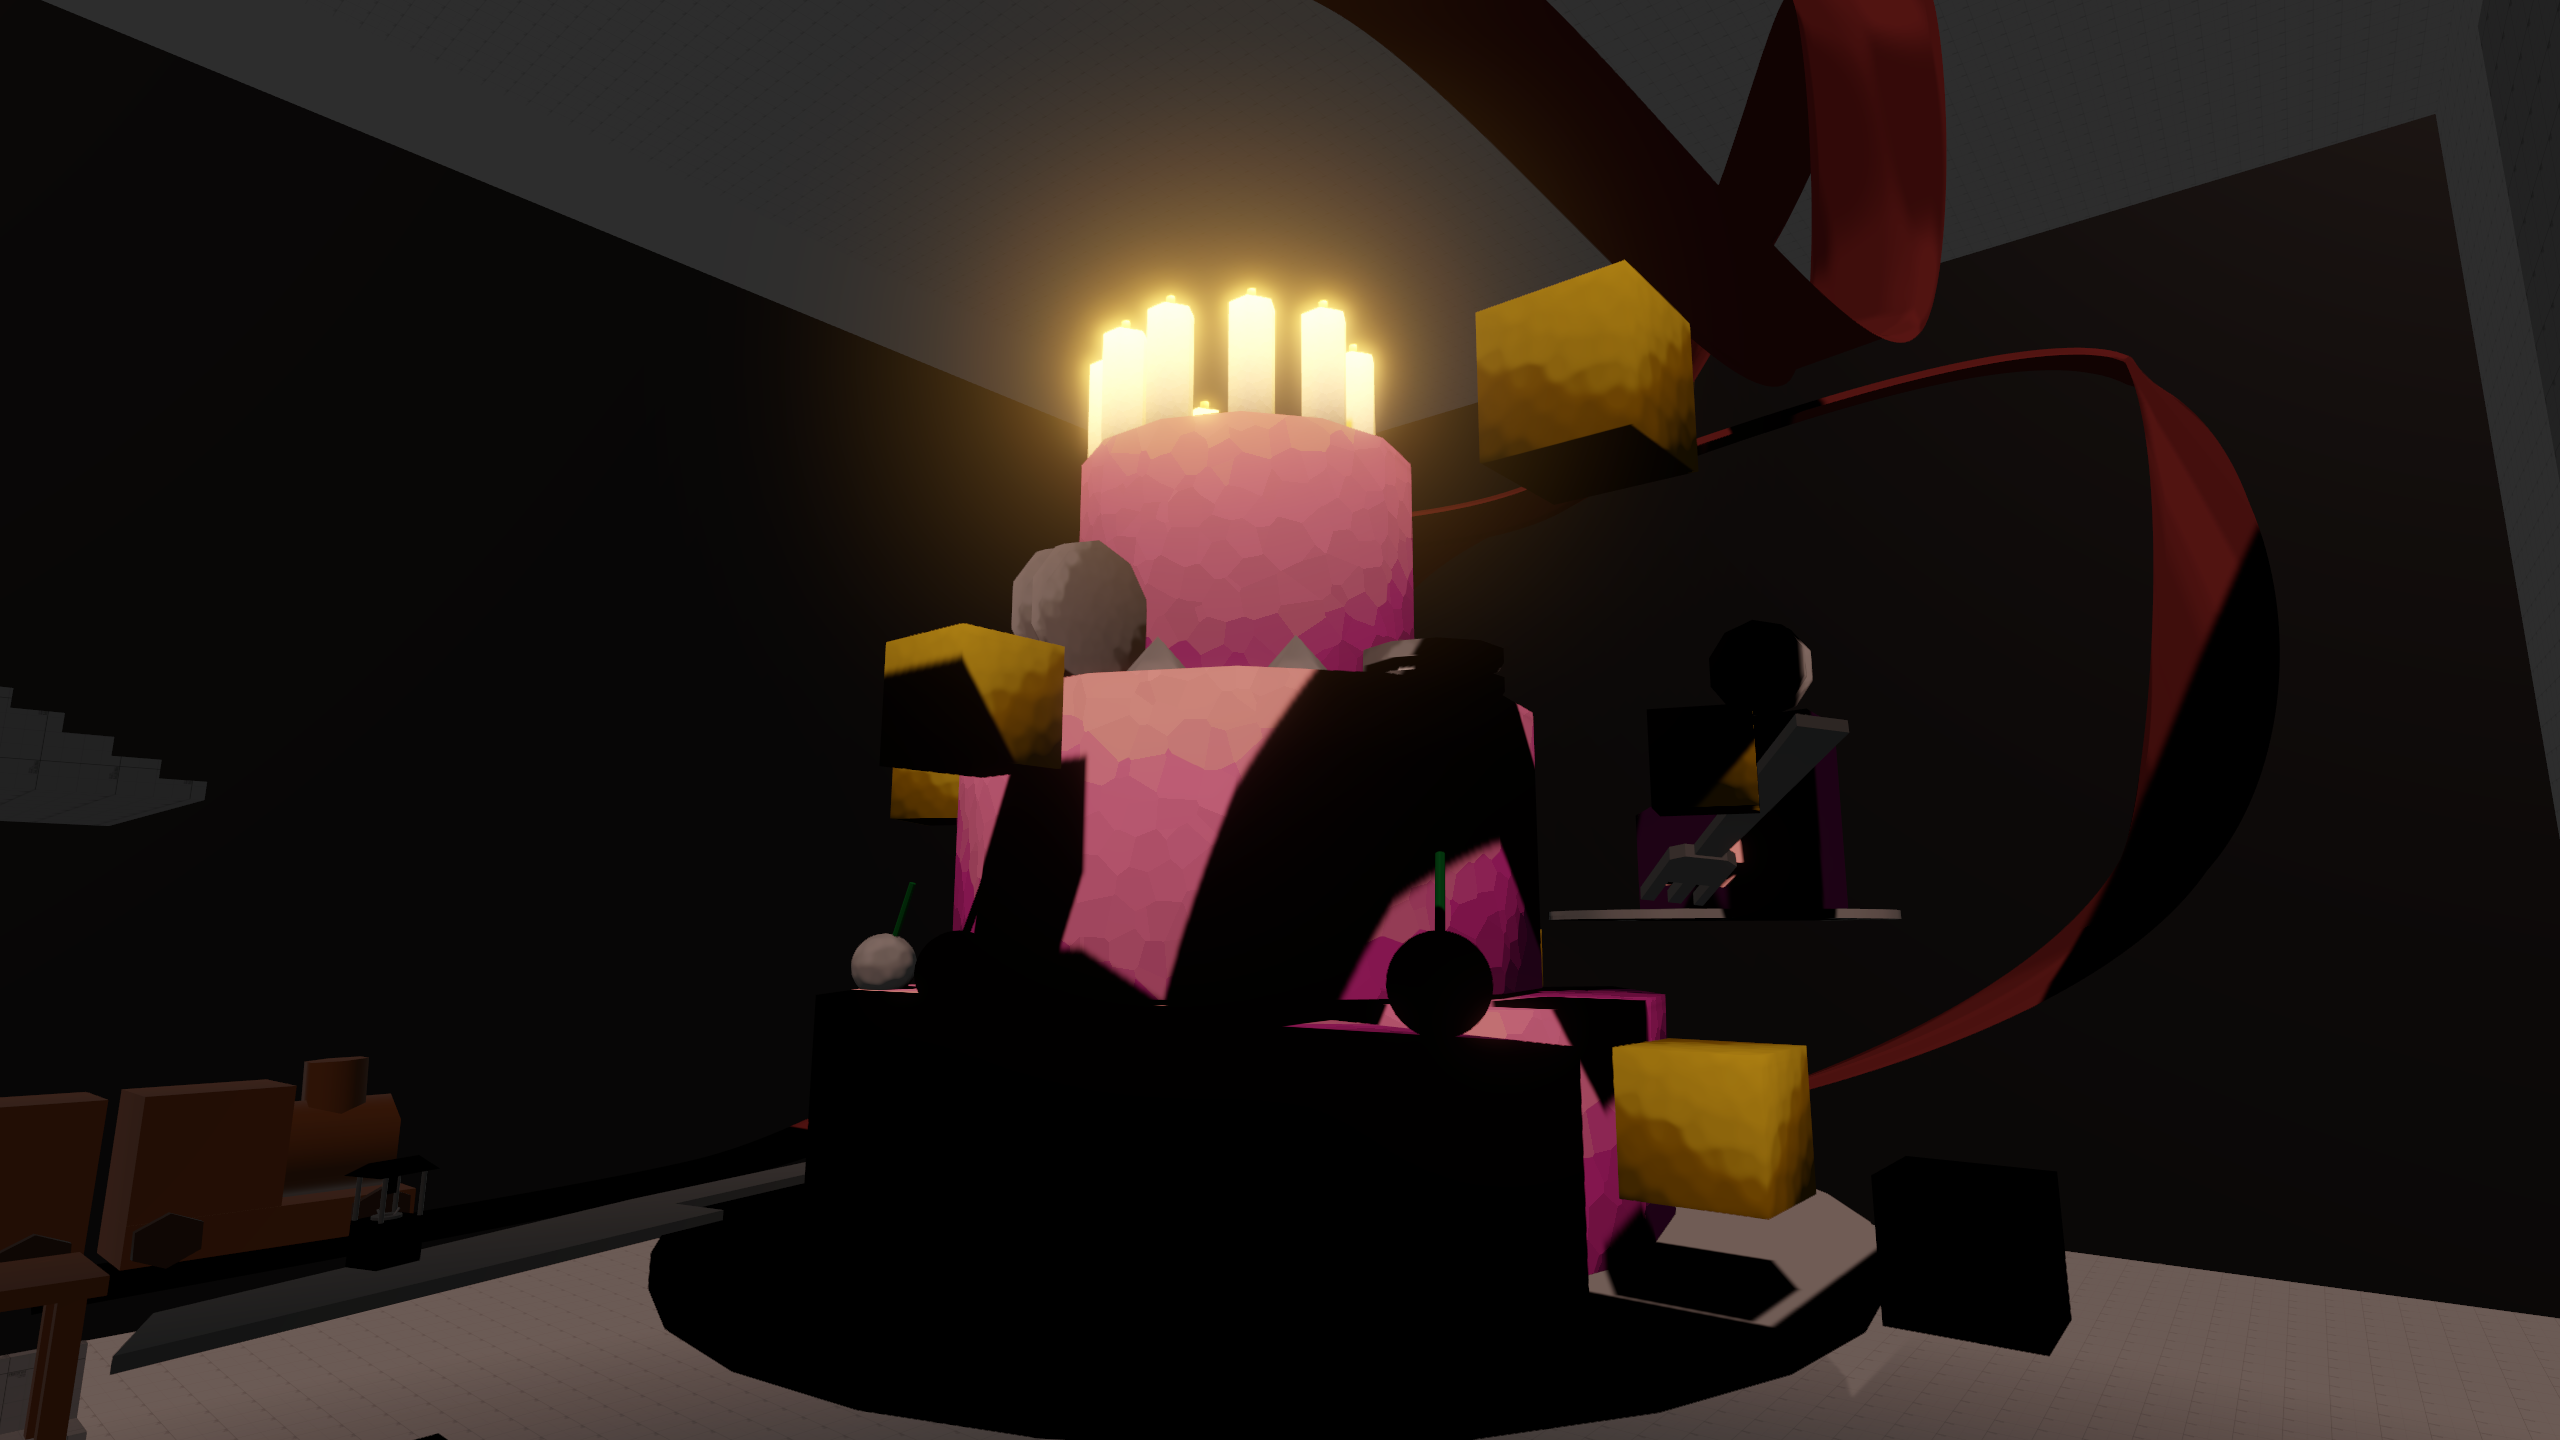
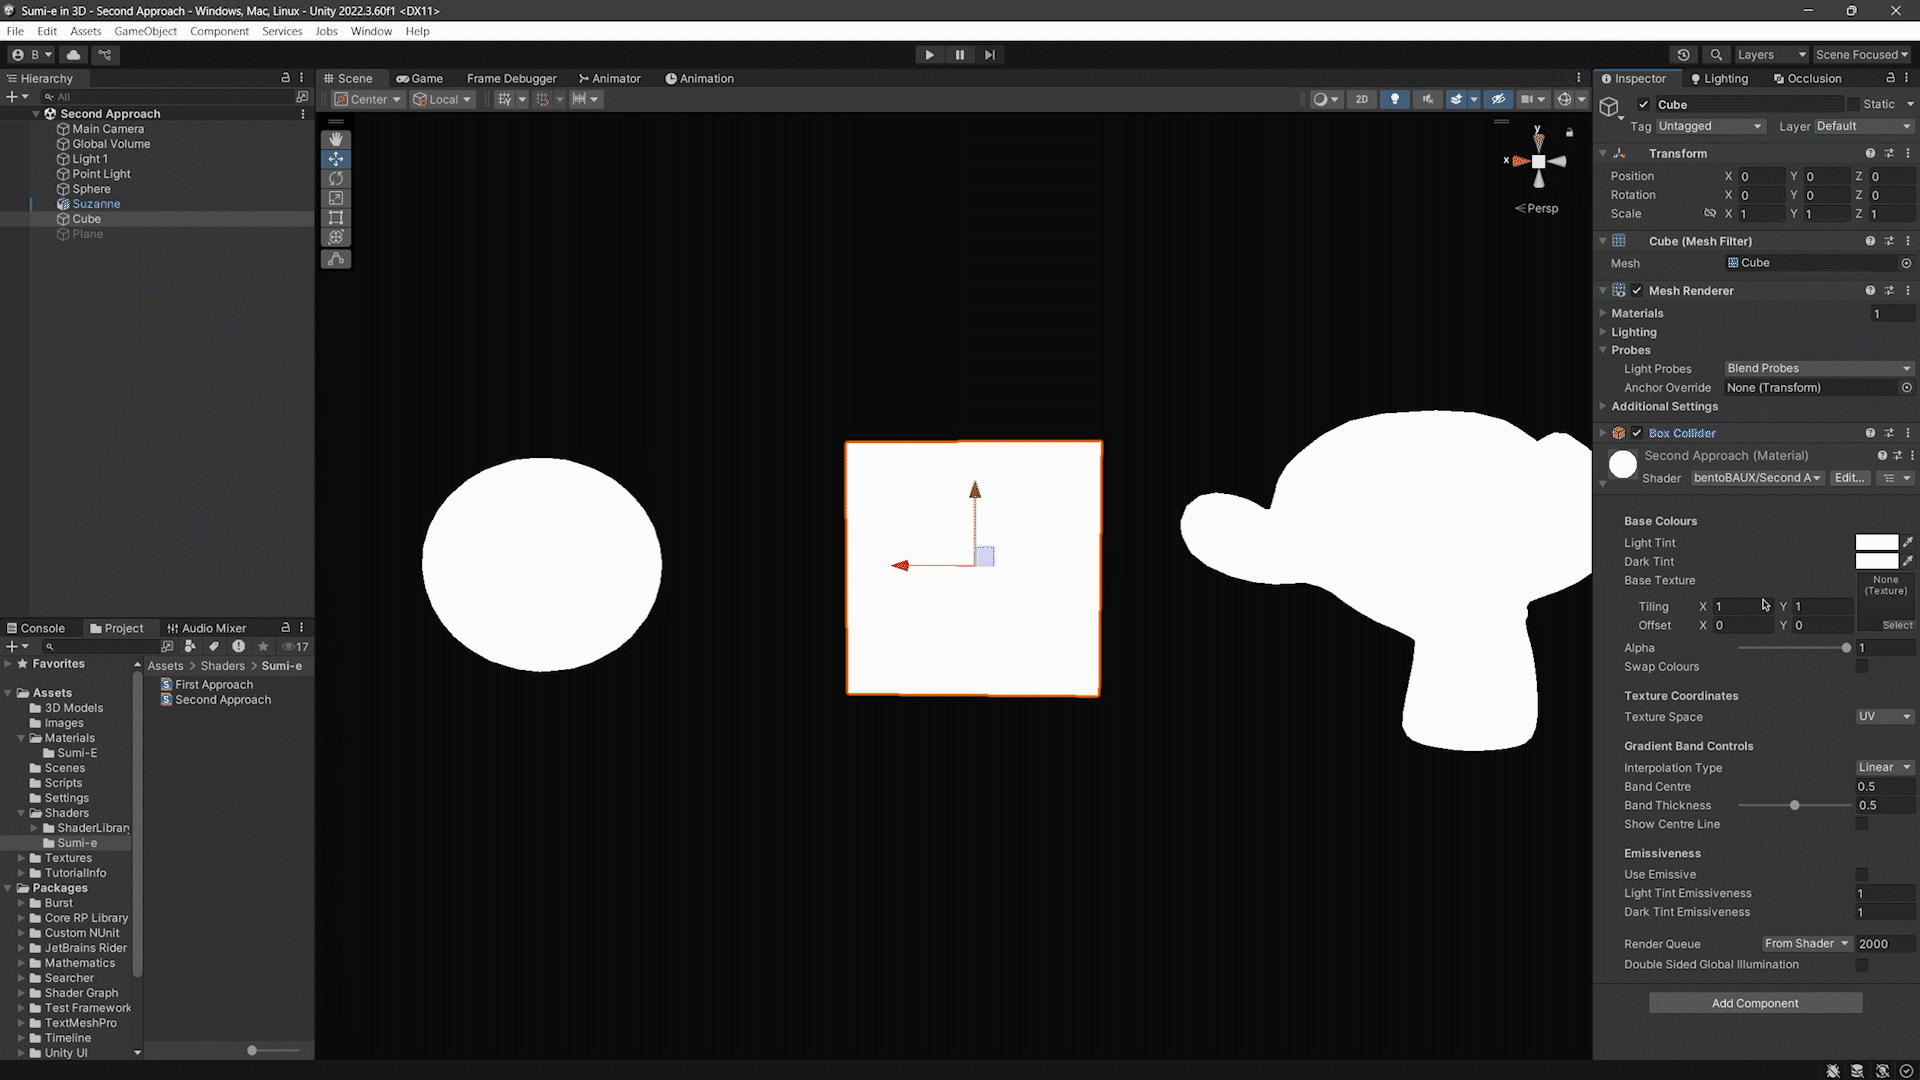
It looked great in isolation, but it fell apart once placed in the actual scene. The method depended heavily on clean topology and UVs, yet most of the level geometry consisted of quick ProBuilder blockouts with awkward topology and unintuitive UV editing. Producing proper assets with retopology, UV packing, and consistent texel density was out of scope while we were also preparing for exams. As a result, the shader required per-object tweaking of every property, where every material relied on a fixed six-step colour ramp that became unmanageable at scene scale.
To achieve the painterly look I could not rely on surface normals, since on large flat faces they all point in the same direction and would have produced flat, uniform colours. This issue was especially pronounced because much of the scene was built from simple, flat shapes. Instead, I used generated texture coordinates, similar to Blender’s Generated output in their Texture Coordinate node, by remapping the object’s local position into the [0,1] range.
While this gave me the variation I wanted, it also introduced shadow artefacts. On large surfaces, there was incomplete shadow coverage, where small areas near the edges of a shadowed face were still lit even though they should have been completely dark.
This happened because of the simplification I made earlier. I used the generated coordinates directly into the Voronoi noise and used its position output in place of the surface normal for Blinn–Phong lighting. In other words, the shading was no longer tied to the true surface normal, so the shadow test and the lighting calculation did not align. This is a known side-effect that can even be reproduced in Blender when shading with generated coordinates.
To reiterate the tediousness of per-object tweaking, this is an example issue that we had when the level was built quickly with ProBuilder due to time constraints. The auto-generated topology and UVs often produced inconsistent shading, even on flat faces, which meant the same shader settings could look correct on one object and completely off on another.
Given the few months we had in a semester, this approach, although seemingly viable at first, turned out to be unsustainable. And just like that, I was back at square one, searching for another way to bring sumi-e into the game.
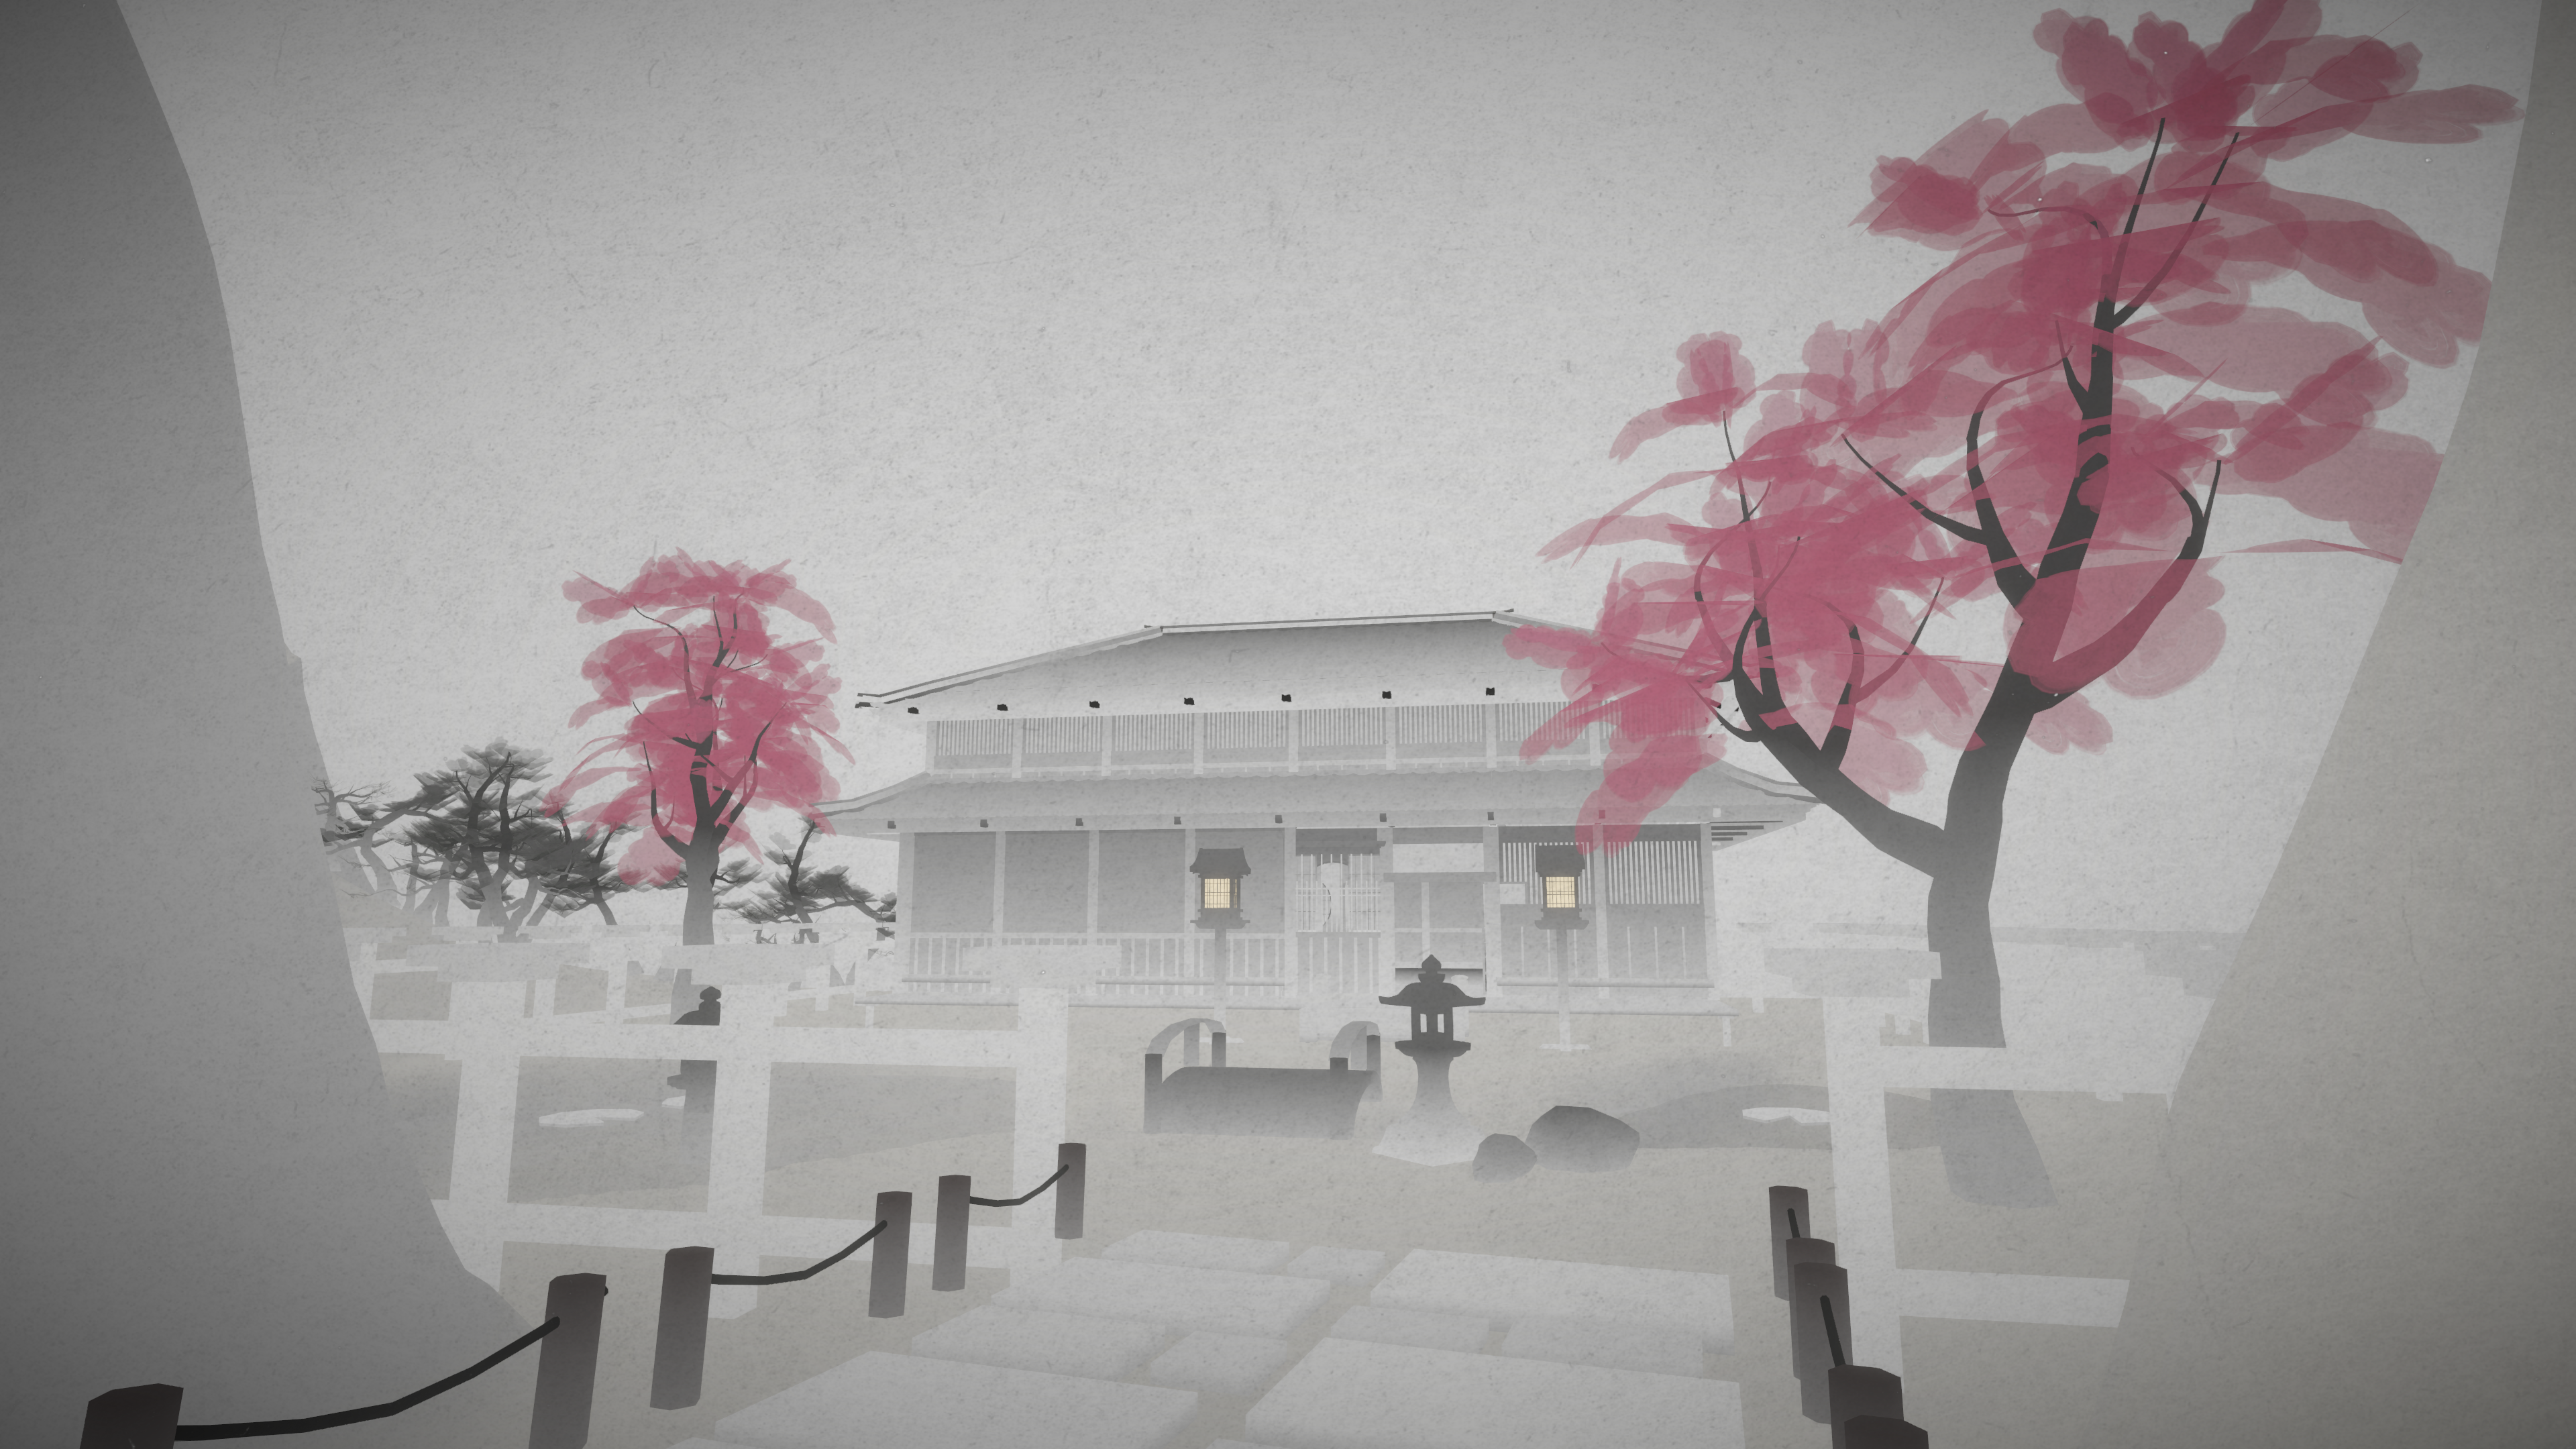
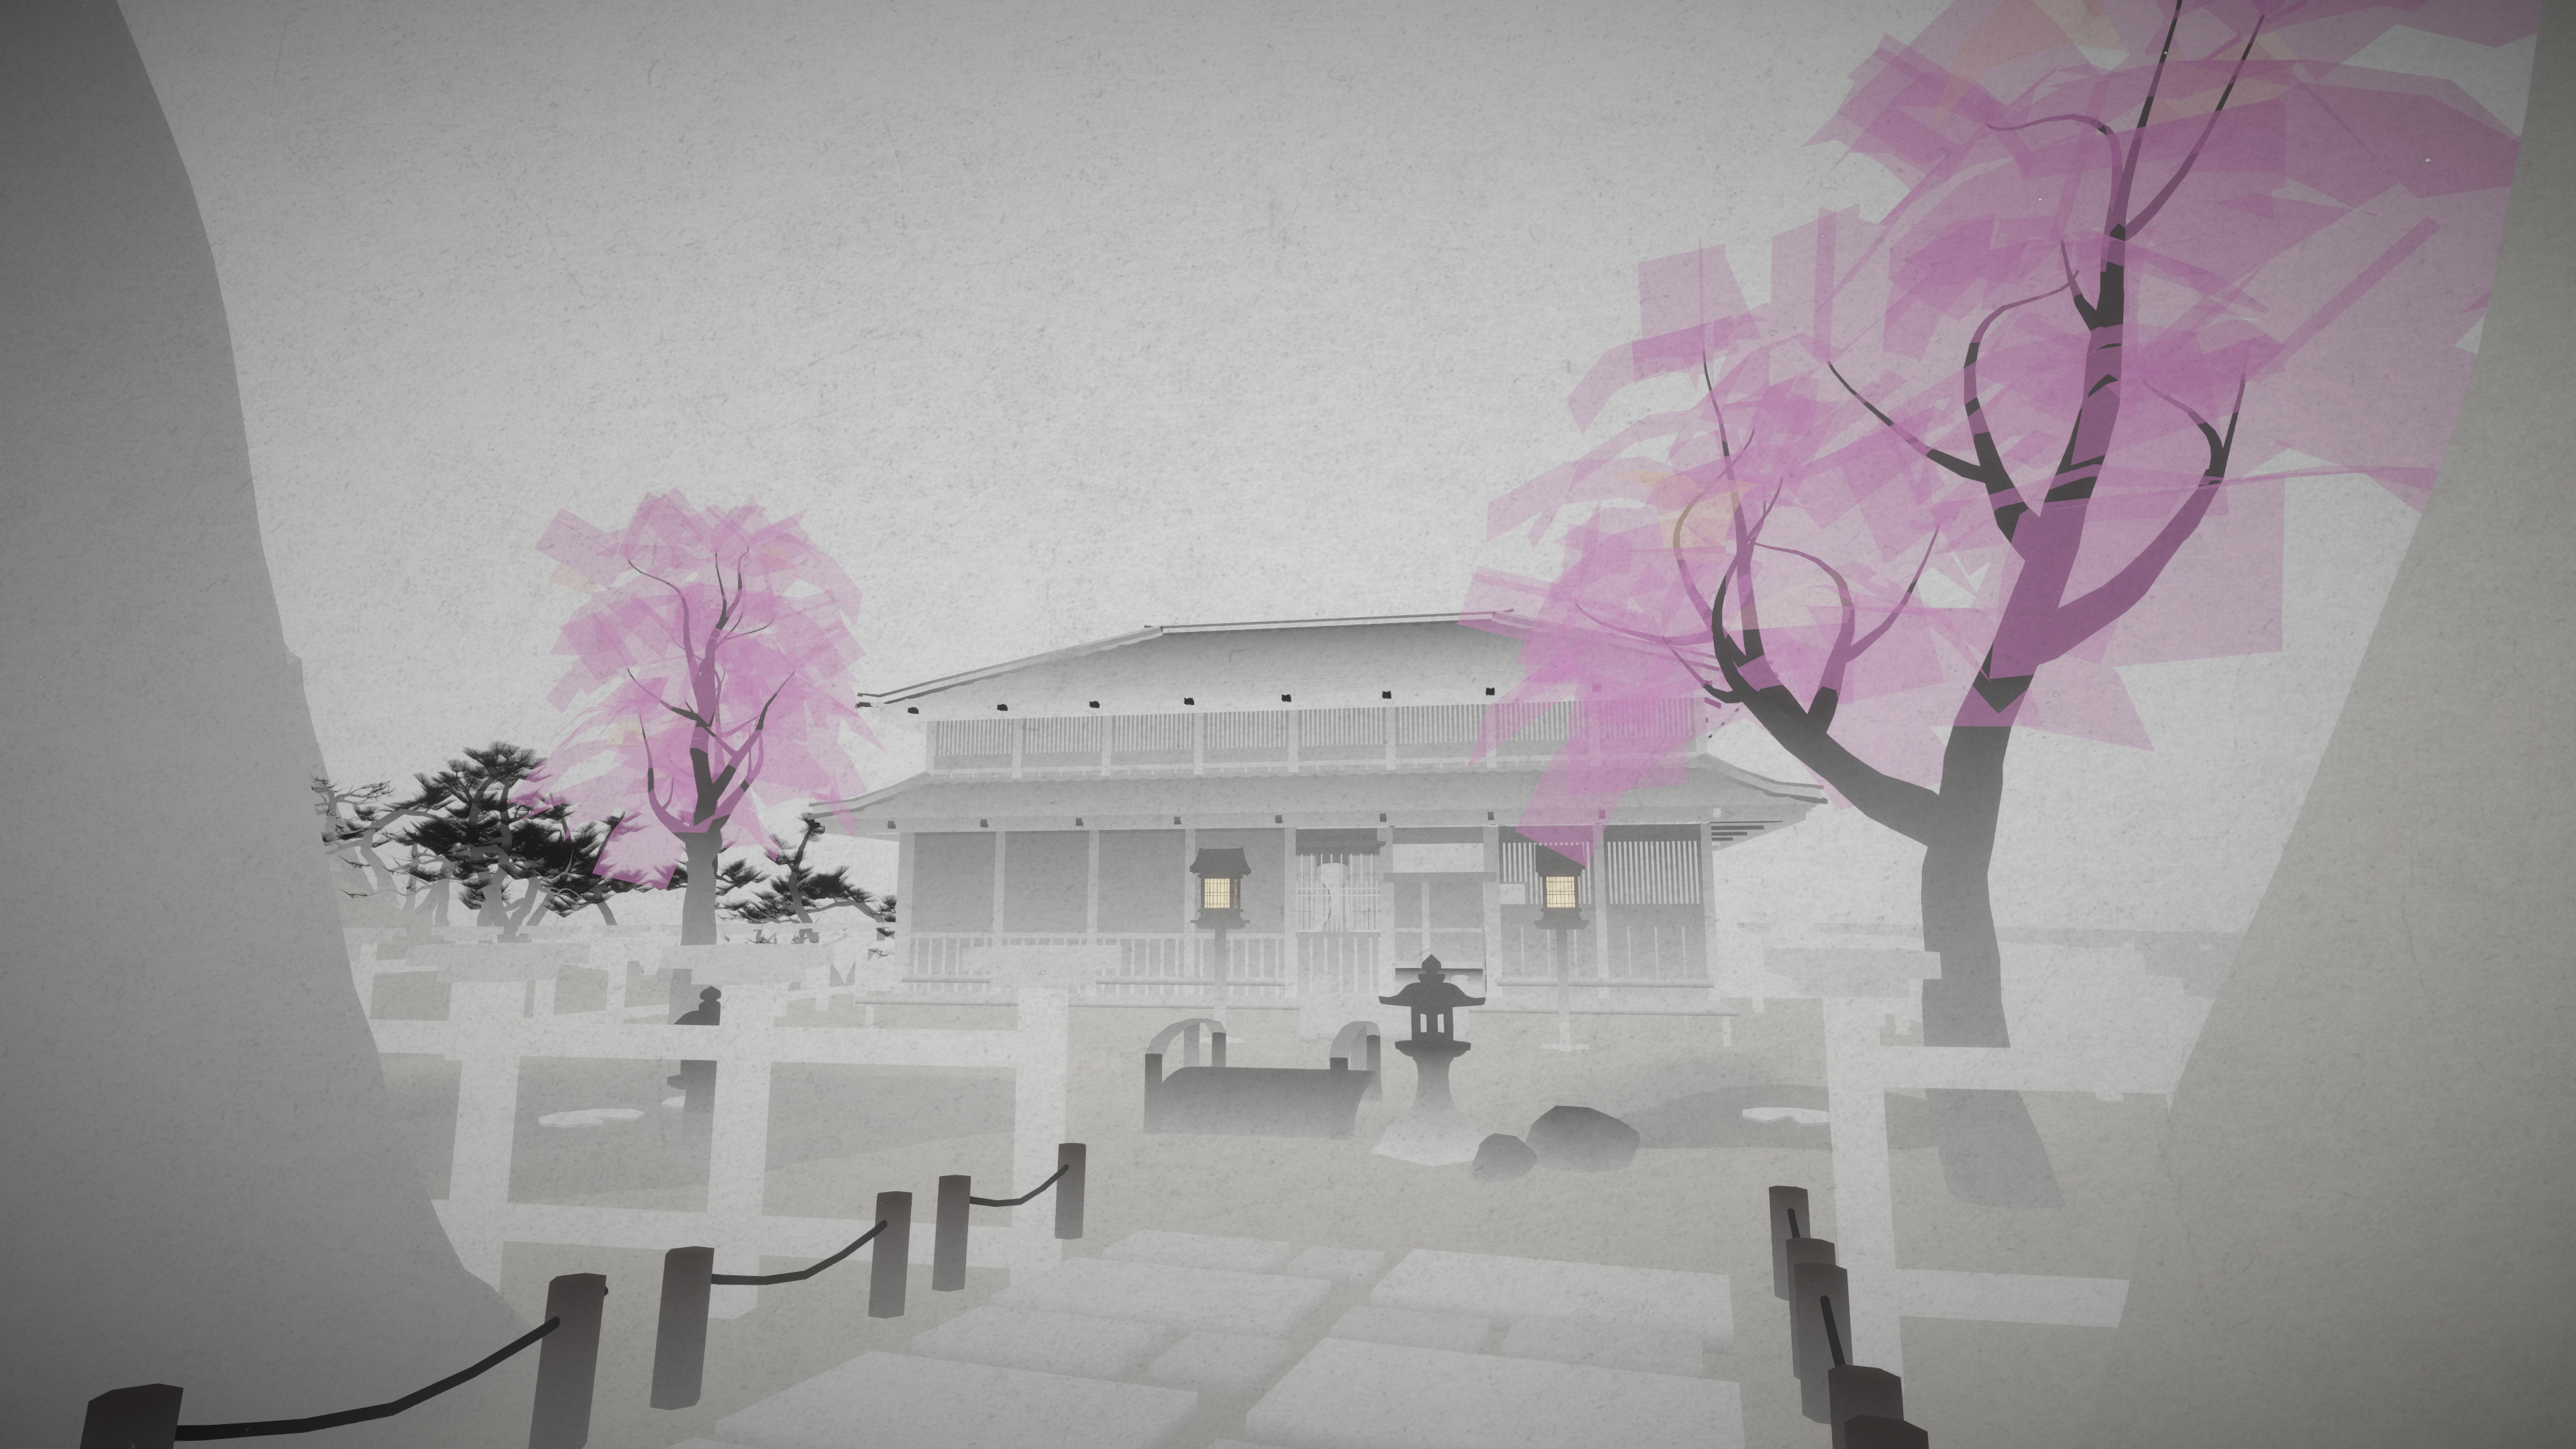
Second Approach: Unlit Gradients and Stylised Tricks
It was around this time that I was privileged enough to get the opportunity to have a chat with Lars Grevsmühl, the developer of OKU. Lars was responsible for shaping OKU’s sumi-e aesthetics, and he shared a few valuable tips with me on how to achieve similar visuals in my own game. The solution turned out to be surprisingly straightforward.
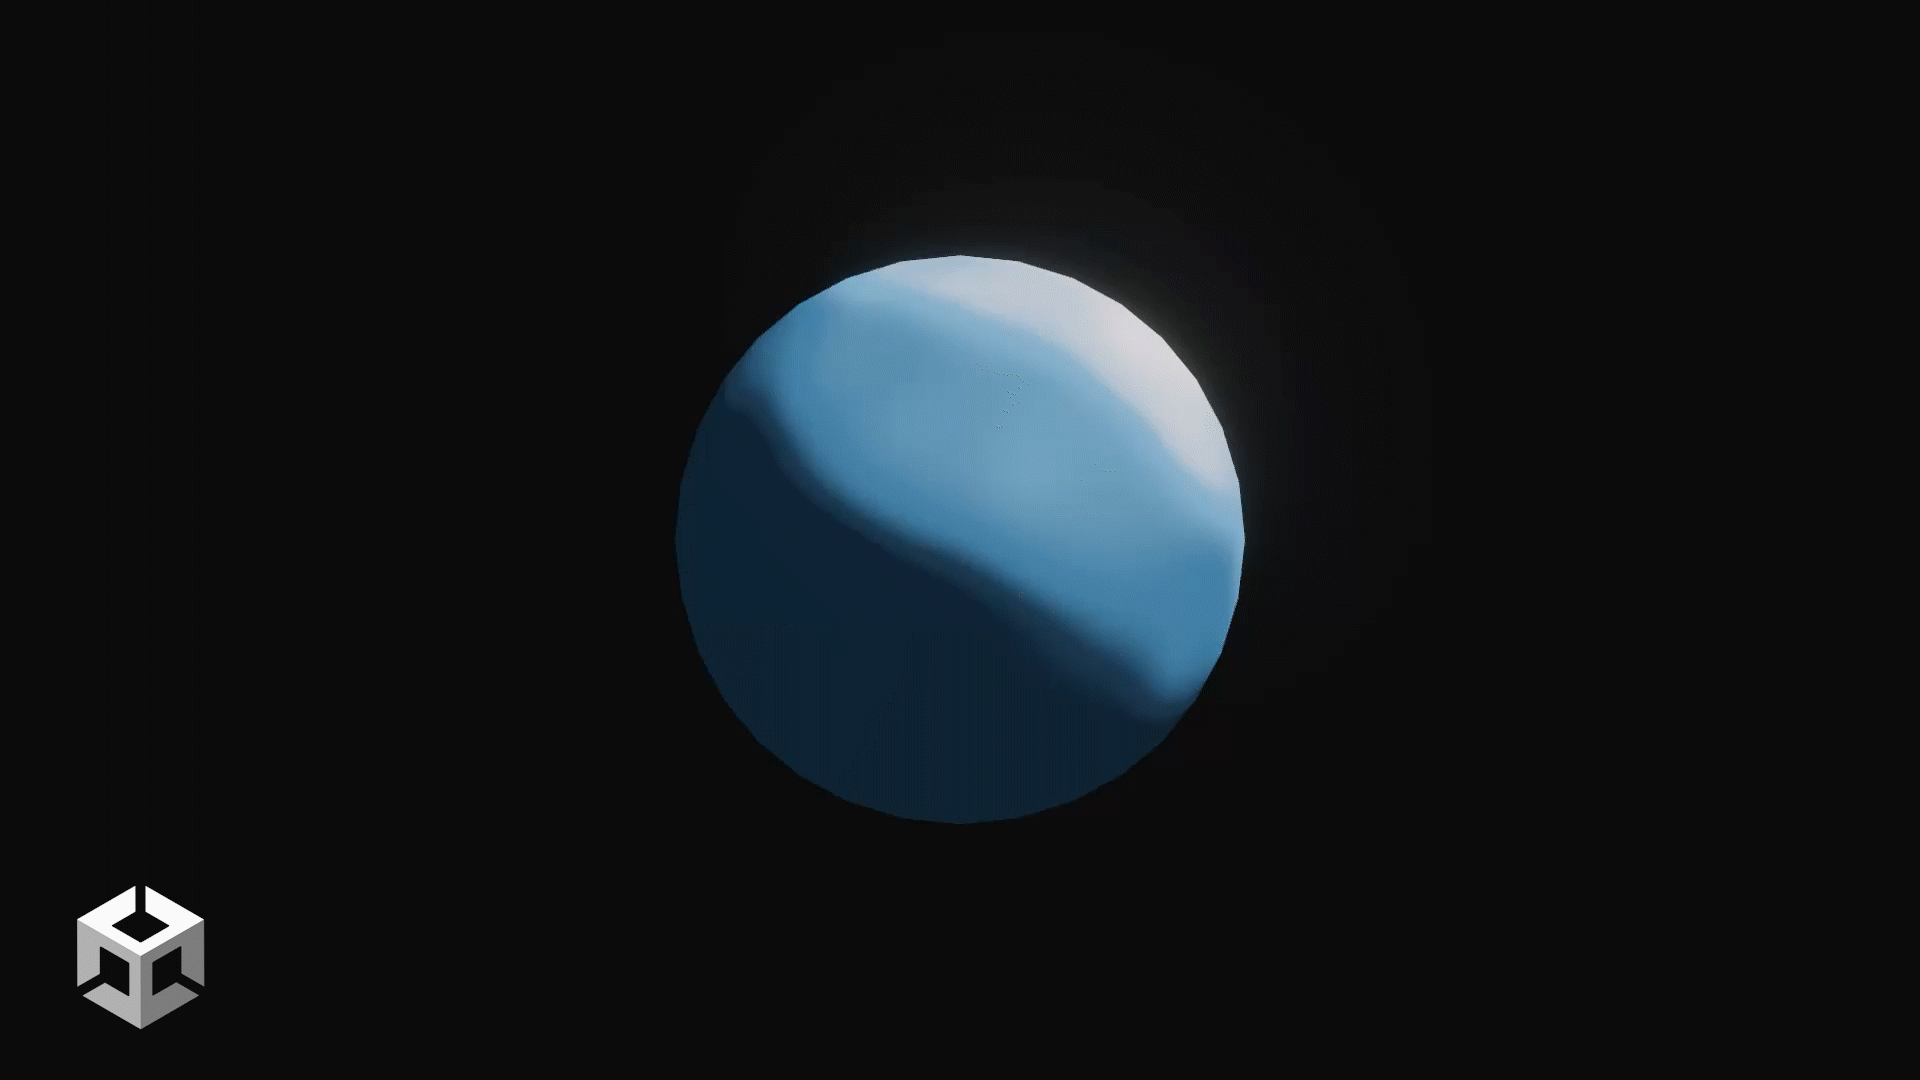
While I was stressing over scene lighting and trying to fix shadow artefacts, I overlooked that a simple unlit shader could achieve the effect with ease. In fact, unlit two-colour gradient materials were enough.
And the key fragment shader stripped of extra features:
1
2
3
4
5
6
7
8
9
10
11
12
13
14
15
16
17
18
19
20
21
22
23
// Derive coordinate system for procedural noise
// "Texture Coordinate" node in Blender for sampling in Generated, Normal, UV, Object and World space
float3 texCoord = GetTextureSpace(_TextureSpace, float3(0, 0, 0) /* Normals not needed here */, input.fragLocalPos, input.fragWorldPos, input.uv);

float bandHalfWidth = saturate(_BandThickness / 2); // Remap to [0, 0.5] for maths

float t = texCoord.y; // Gradient is based on y value.

// Set interpolation types
float fac;
if (_InterpolationType == 1)
{
    fac = ramp_linear(t, _BandCentre, bandHalfWidth); // Linear Interpolation
}
else if (_InterpolationType == 2)
{
    fac = ramp_ease(t, _BandCentre, bandHalfWidth); // "Ease" Interpolation
}

float3 base = tex2D(_BaseTexture, input.uv).rgb;
half3 finalColour = lerp(_LightTint.rgb, _DarkTint.rgb * base, fac);

return half4(finalColour, _Alpha);
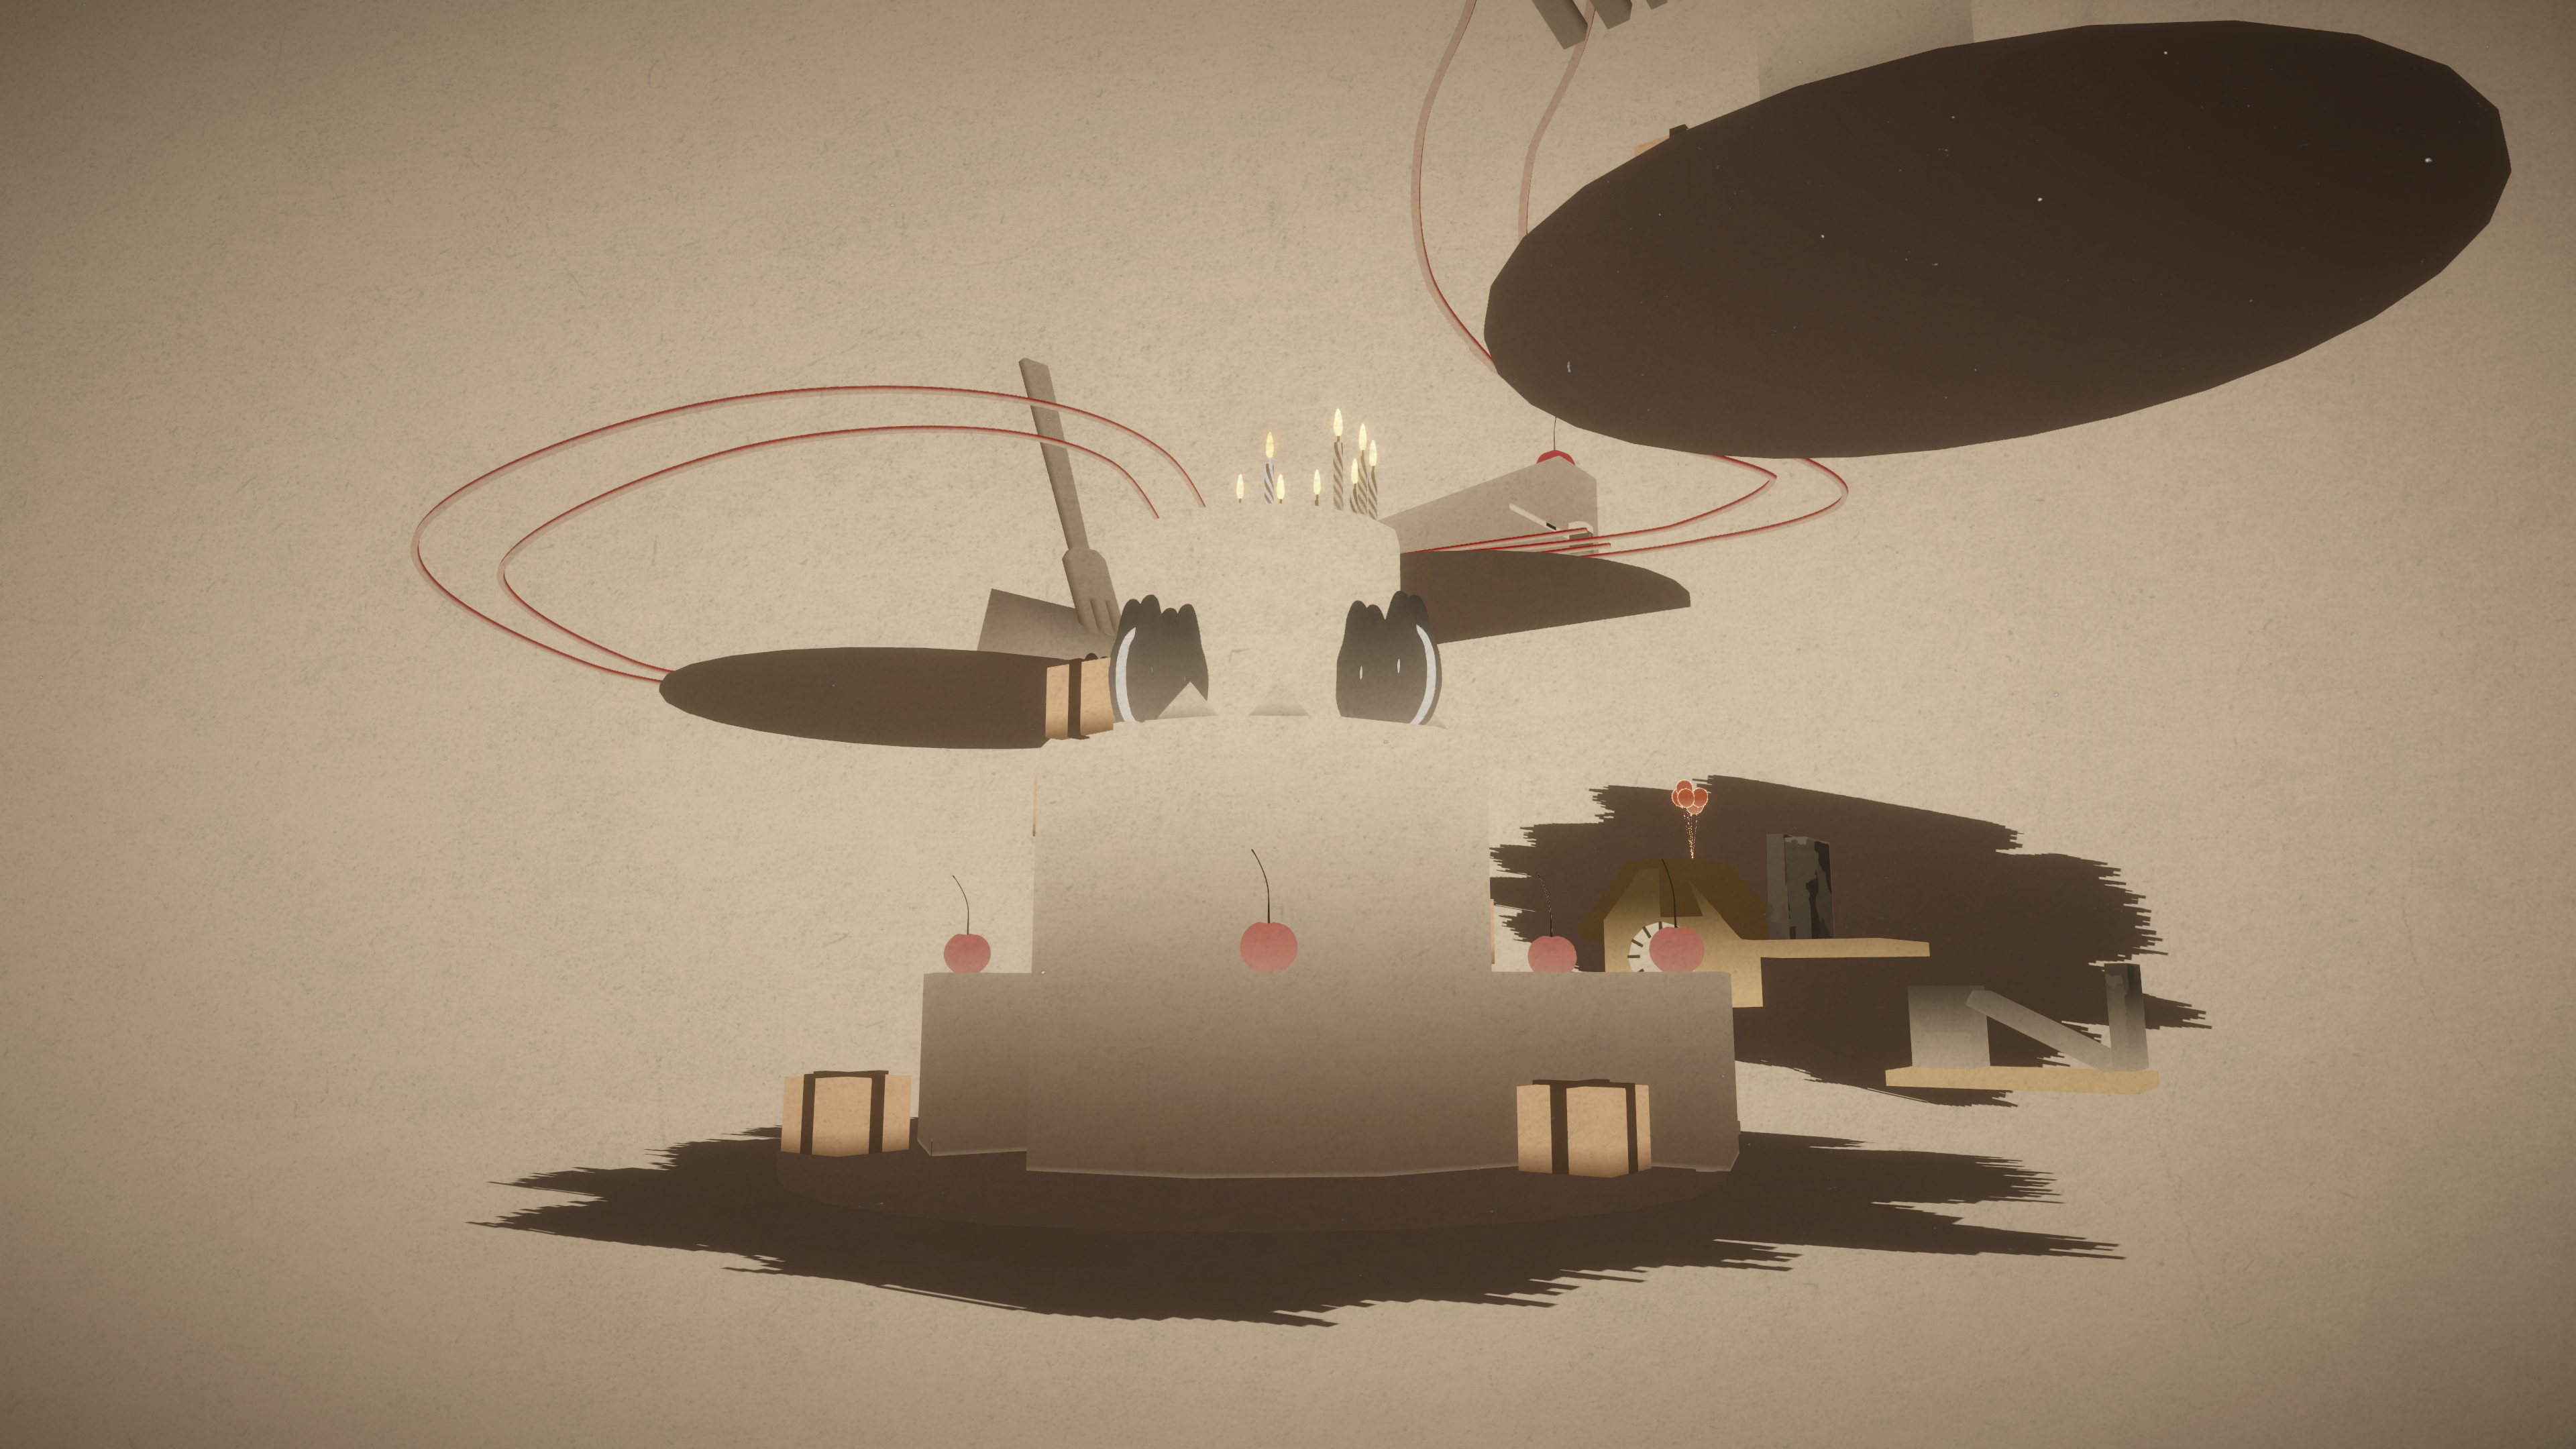
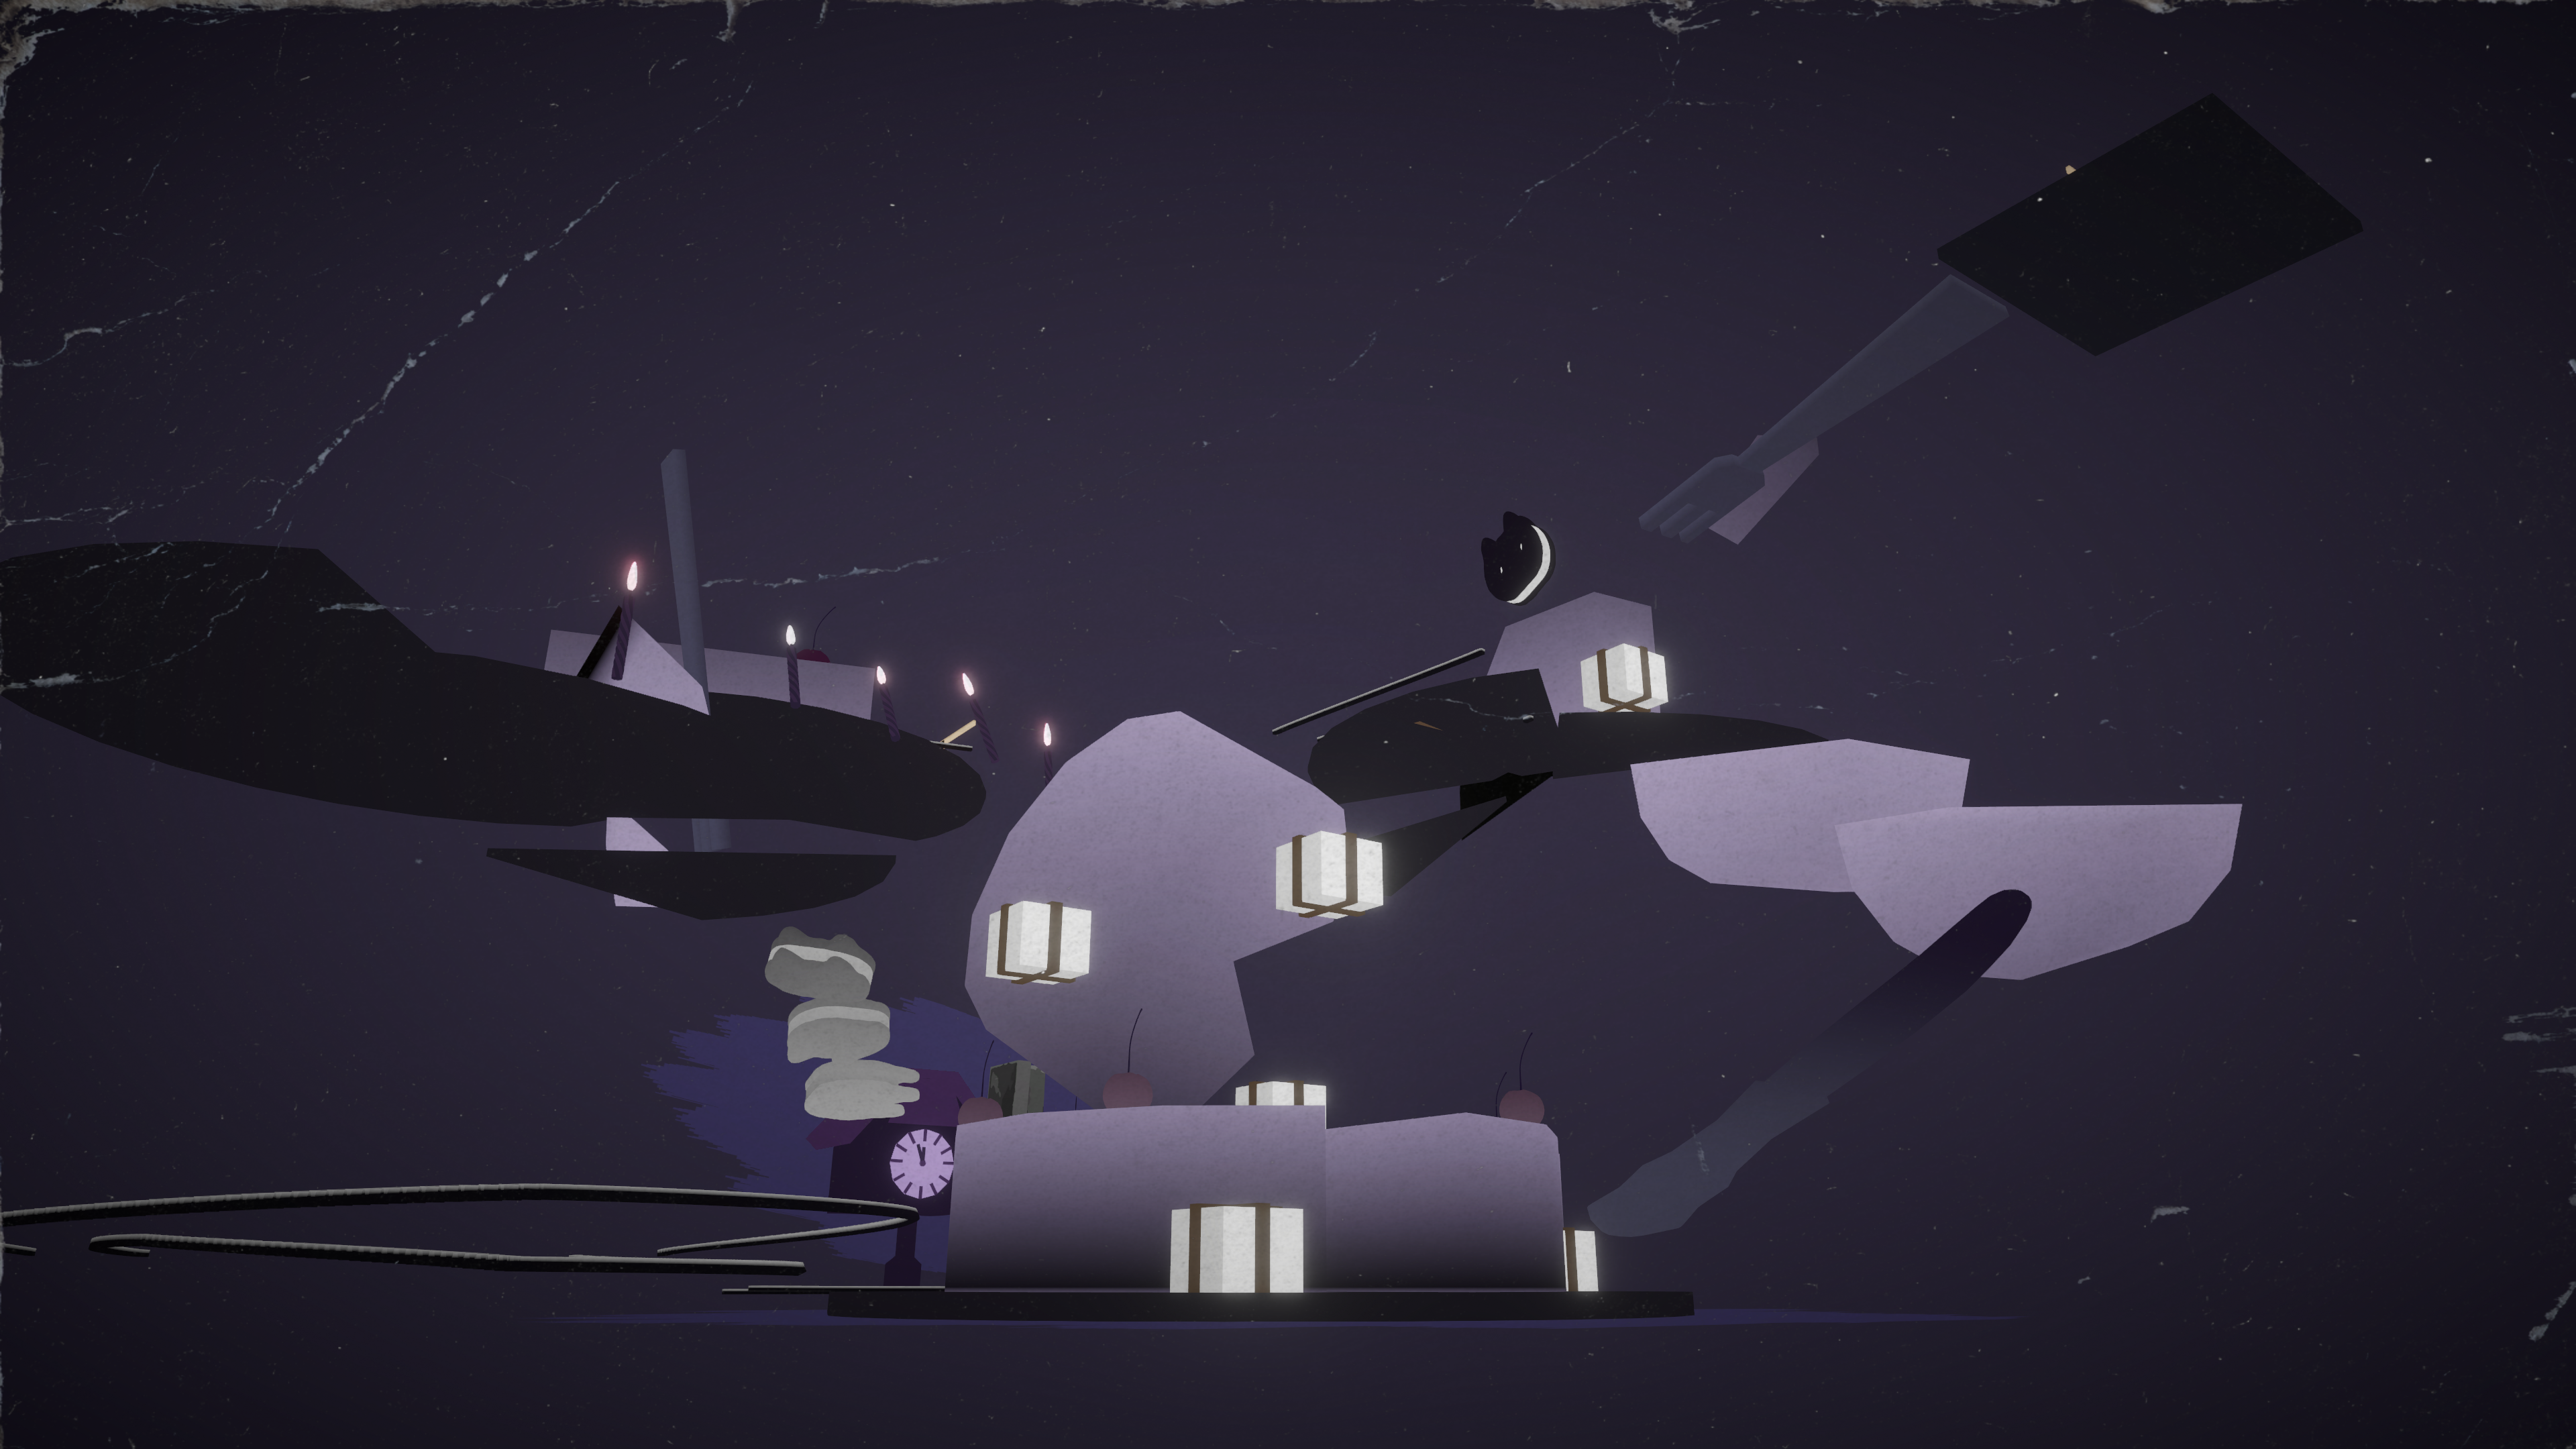
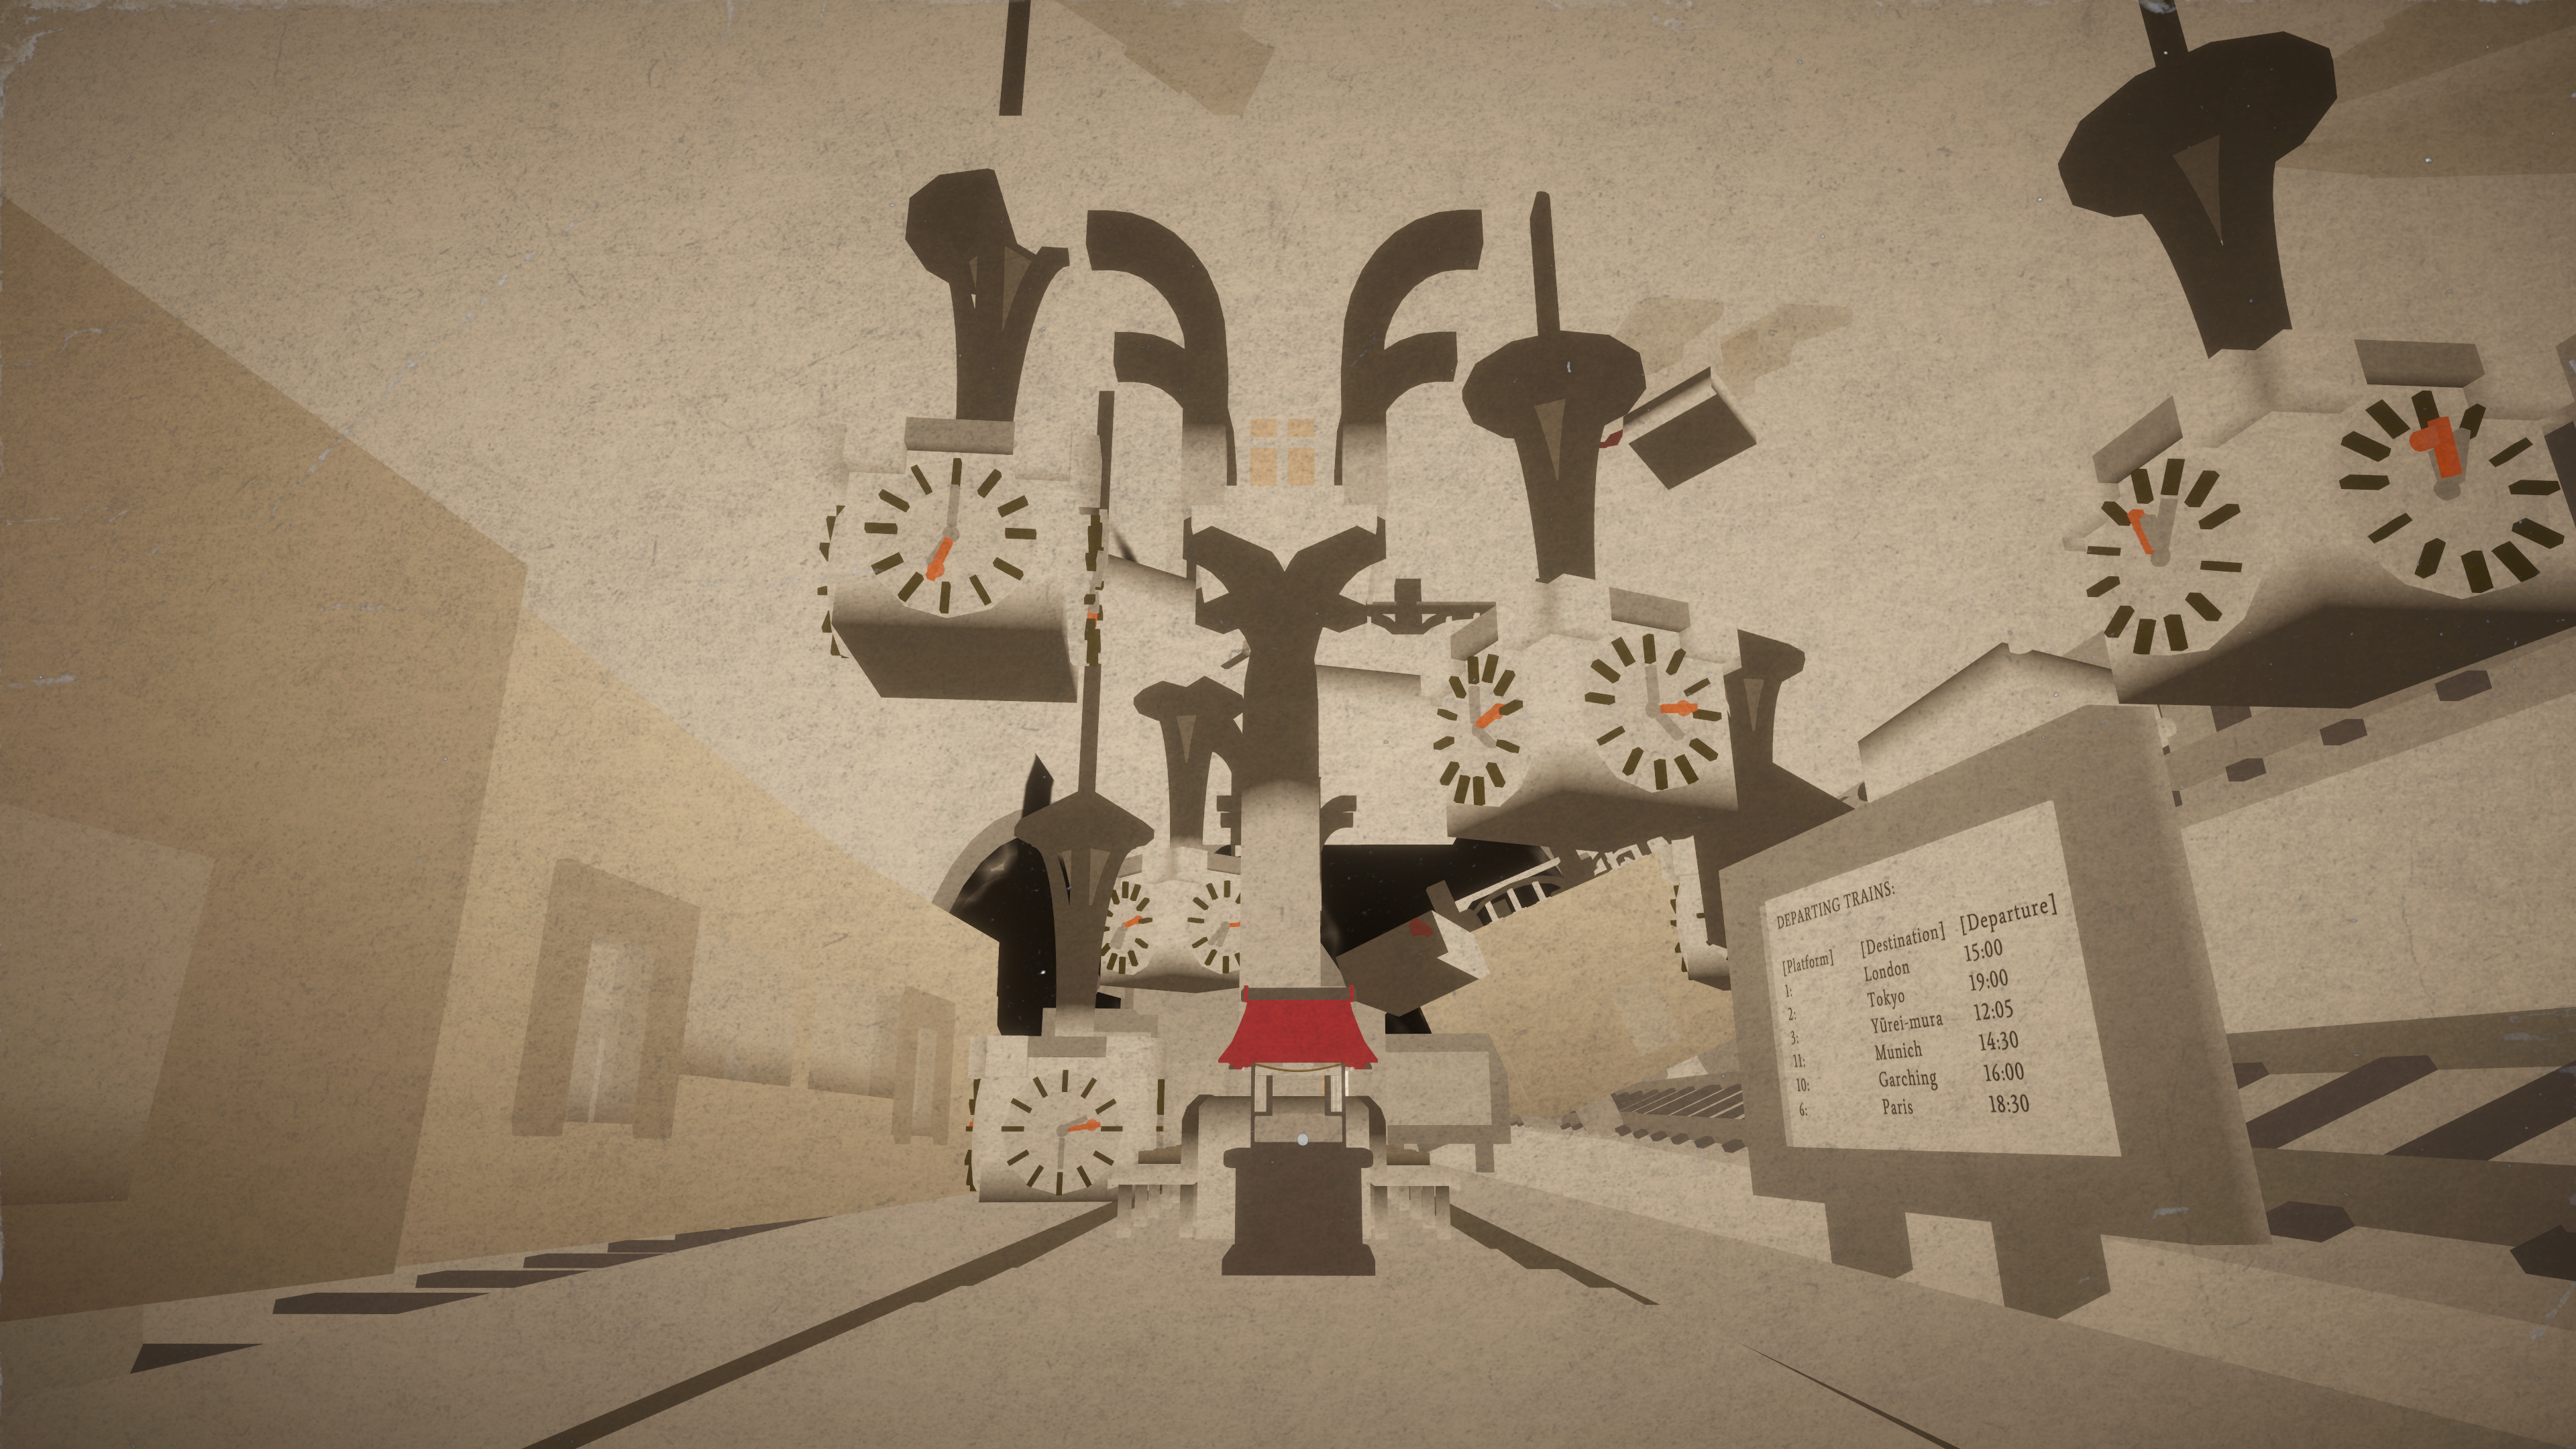
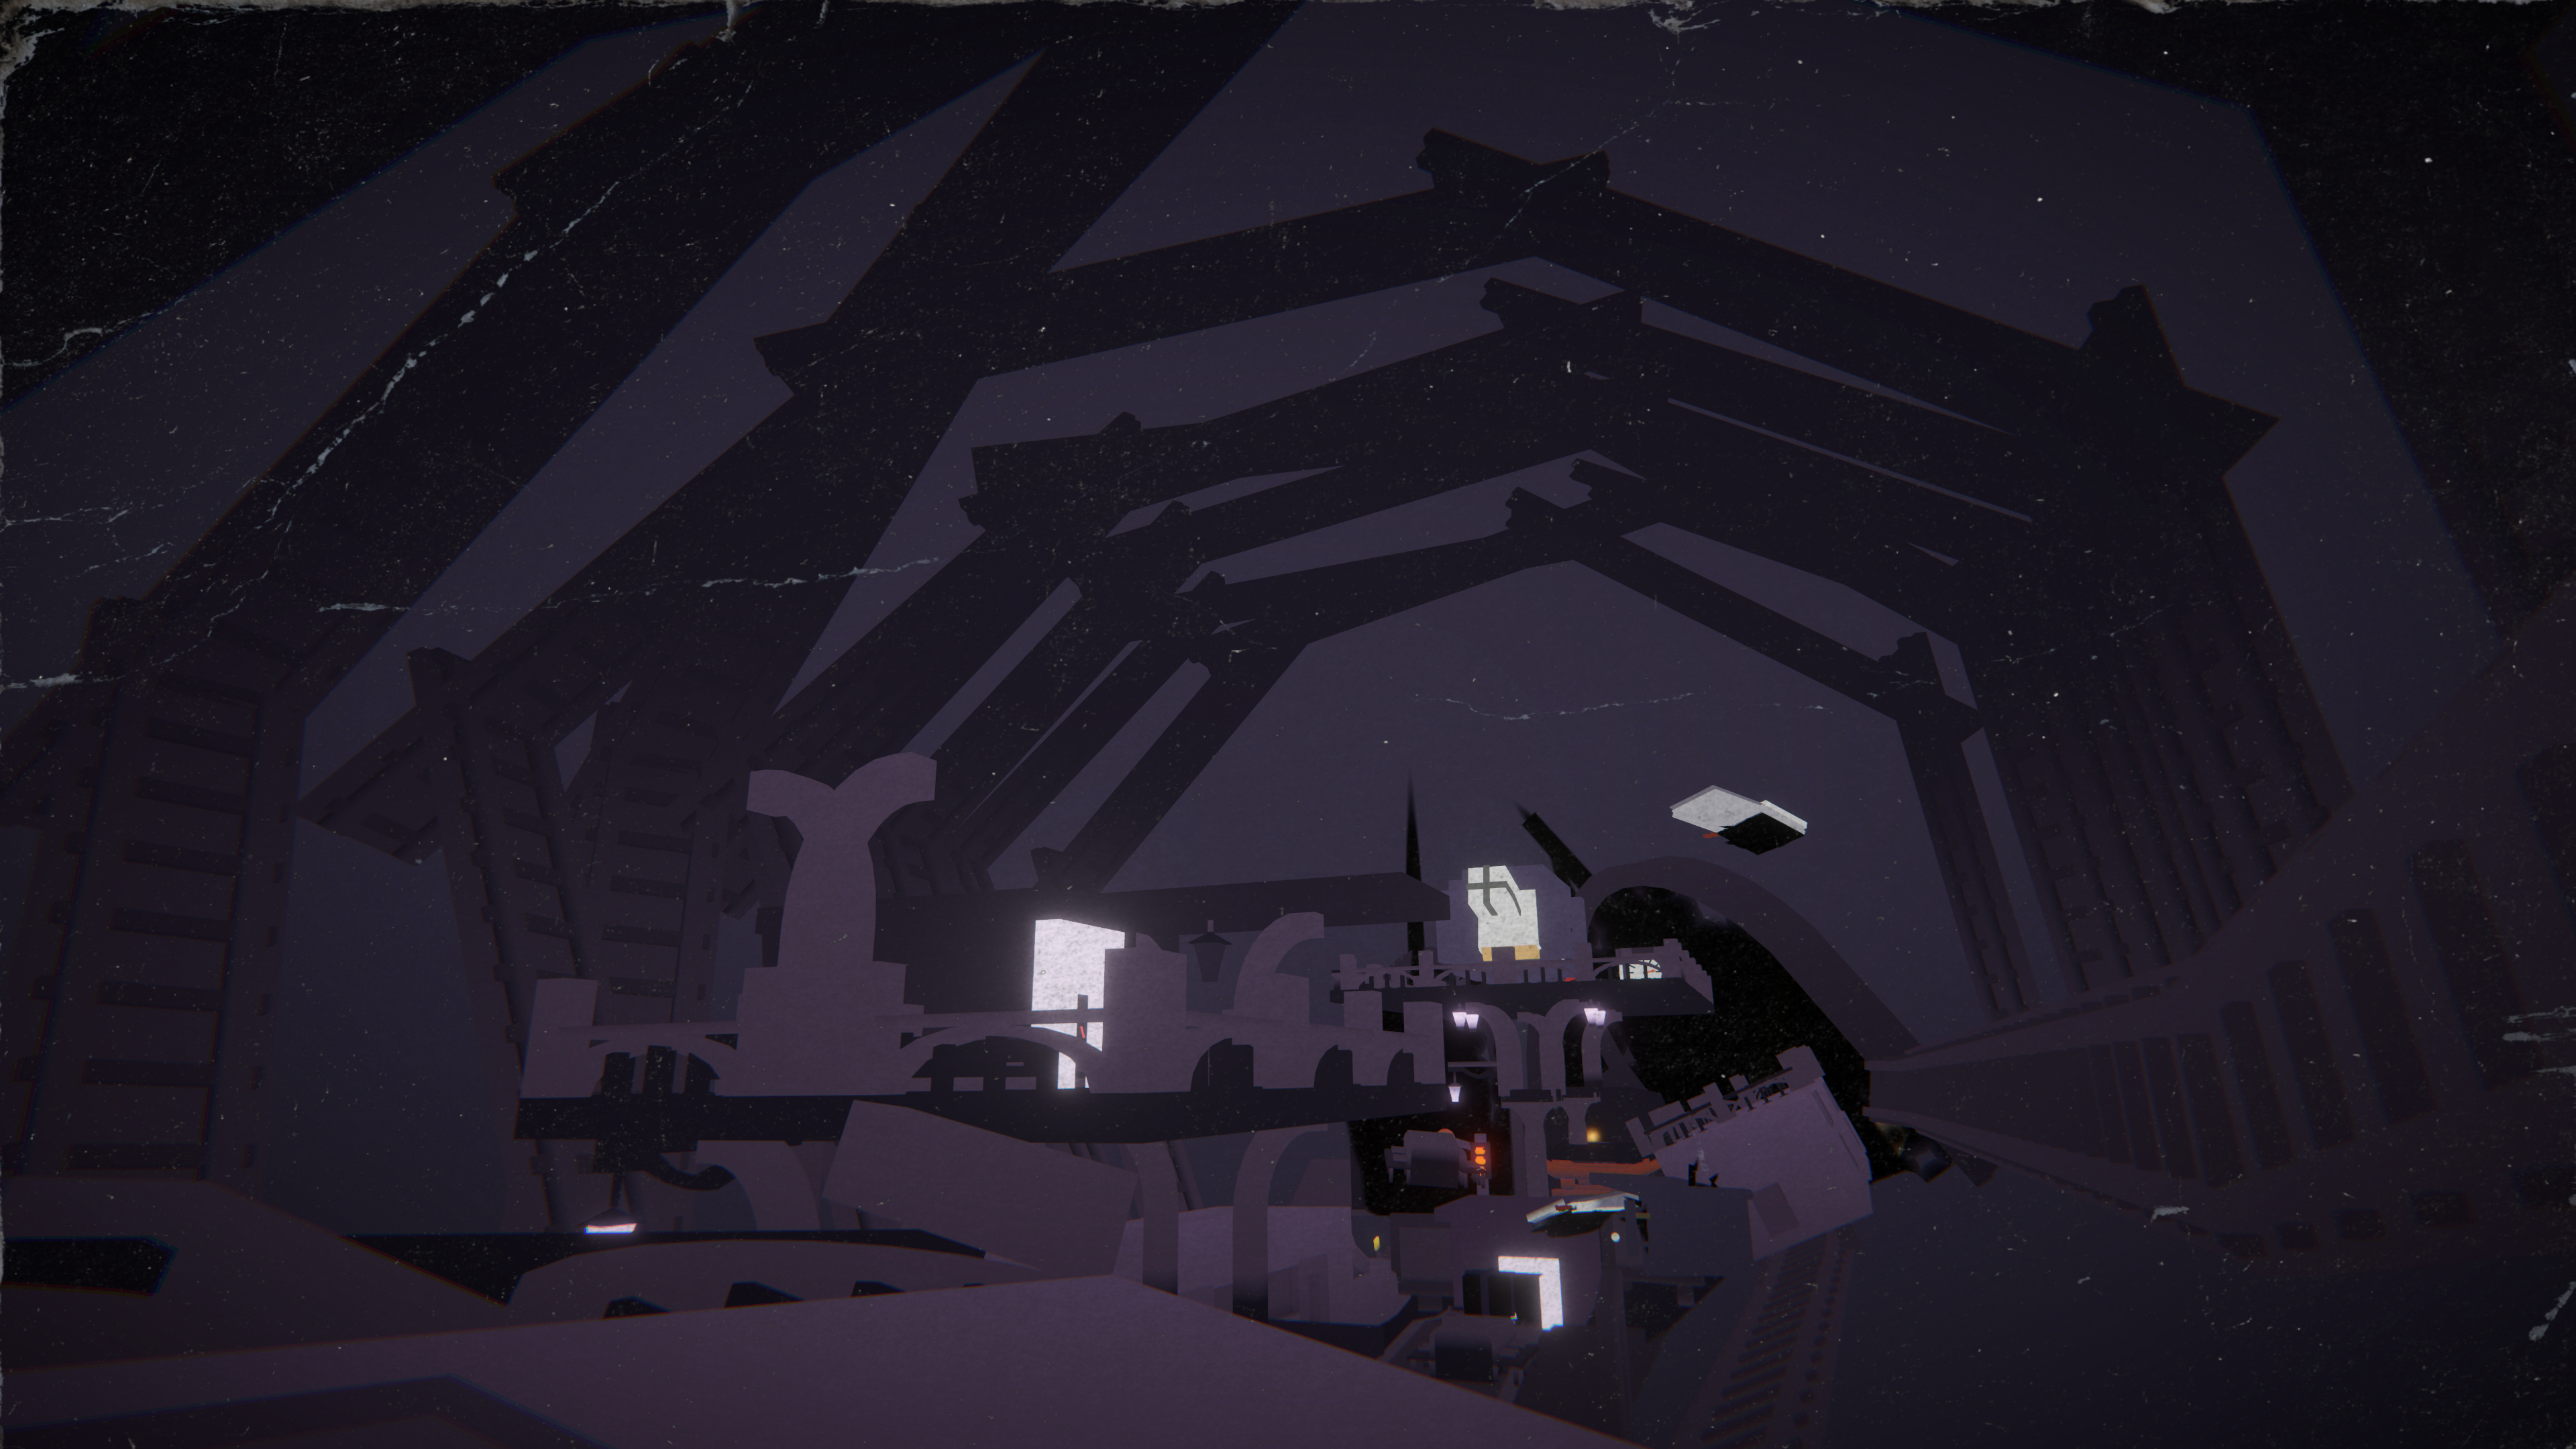
This approach is simple yet effective. To enhance the scene with a more painterly feel, I overlaid a paper texture. Here are the results:
Reflections
At the time of writing this devlog, I have realised a few things I could have done better. For example, the main problem in my first approach came directly from a simplification I had made: I was not using the true surface normals anywhere in the shader. In hindsight, this would have been straightforward to fix once I understood the cause. In fact, I have made a version that implemented the original shader in Blender but discarded it after spending too long fixing some problems with the fBM noise! But at the time, with the fog of stress and rushing deadlines, it was much harder to see clearly.
In the second approach, the version shown here is already a much cleaner iteration compared to what I had during development. The earlier state was messy, and while I won’t show it here, it had a real impact on the workflow. Creating materials for every asset in the scene was already time-consuming, and since each one also needed variants for different emotions, the workload multiplied quickly. I could have written simple scripts to automate tint changes, but I did not, partly out of fatigue and partly out of laziness.
Furthermore, in the last scene screenshot, you can see that some materials are missing gradients. This happened because their parent object was set to Static, which caused Unity to treat the entire hierarchy as a single combined mesh. As a result, the generated coordinates were calculated across the whole object instead of per piece. The issue could have been avoided by setting each child object to Static individually rather than applying it to the parent. However, fixing it would have meant editing a large number of GameObjects in the hierarchy, which wasn’t feasible under the Gamescom deadline. So I left it as it was.
All things considered, I believe we achieved the aesthetic we set out for. We received many positive feedbacks on the game’s visuals and on how effectively it conveyed emotions in a surreal way. Despite the flaws, I am satisfied with the work for this project. The next ones will only get better.
Credits
I have written a long devlog about my work, but none of it would have been possible without my teammates. Each of them brought their own expertise and dedication to the project:
- Felipe Lucas: Team leader who ensured smooth communication within the group and kept the project on schedule.
- Dawin Yurtseven: Programmer whose focus on delivering a fluid gameplay experience shaped the feel of the game. His dedication included countless late-night debugging sessions.
- Alexandra Menshikova: Level designer who created the cozy, inviting opening levels that guided players into the world of Forgotten Colors.
- Patrick Zimmerman: Level designer behind the intricate and visually striking design of the second level, adding depth and challenge to the experience.
- Tamaki Richter: Writer who developed the narrative framework and emotional core that the entire game revolves around.
- Chris Kohler: Composer who crafted the soundtrack, reinforcing the emotional atmosphere and immersing players in the game’s world.
- Kirill Shcherbakov: Programmer who supported development during the project.
Thank you for taking the time to read this devlog. I hope you enjoyed reading it as much as I did writing it. See you in the next one!